Window Motor Mount Repair
Moderator: F9K9
Window Motor Mount Repair
Like others my Crew was making an annoying popping sound every time I razed or lowered the drivers side window so today I decided to make it go away. I took some photo's and put together a "How To" to help others that may have the problem also.
Loose power window motor fix.
Tools and hardware needed:
Philips screwdriver.
Plastic and heavy steel putty knife.
Hand held grinder or dremel.
9/32 nut driver or socket
Four 1/4" bolts or machine screws with locking nuts and washers.
Tape (Optional)
First remove the switch control panel by pulling up on the front of the panel then forward to free the back.
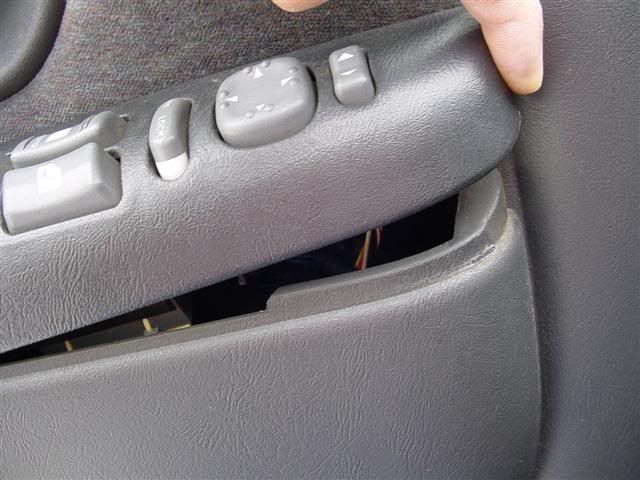
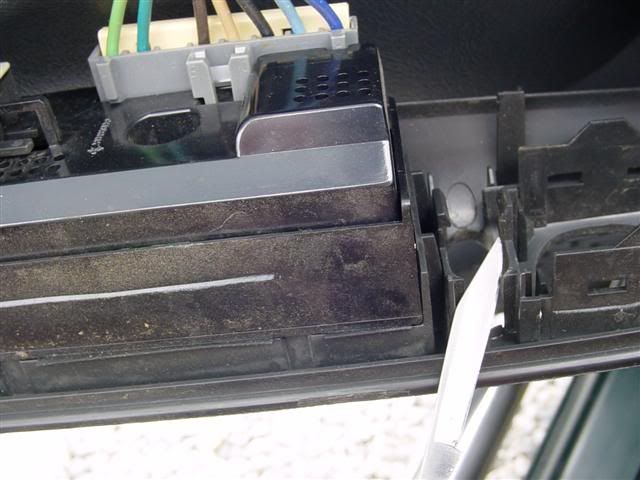
Remove the mirrow adjustment switch and the power window lock switch by unlocking the tabs on each side of the switch.
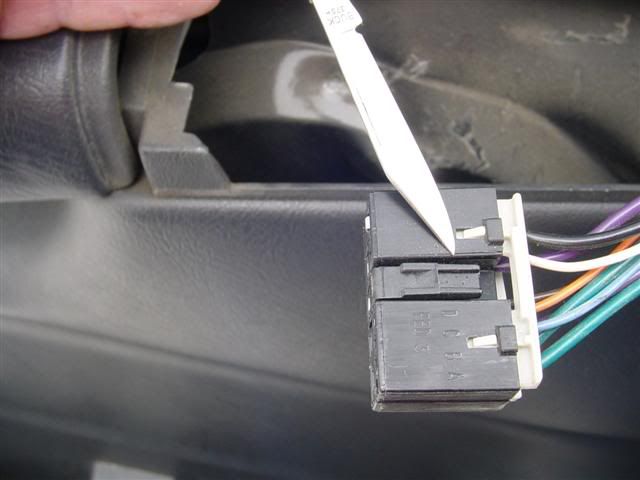
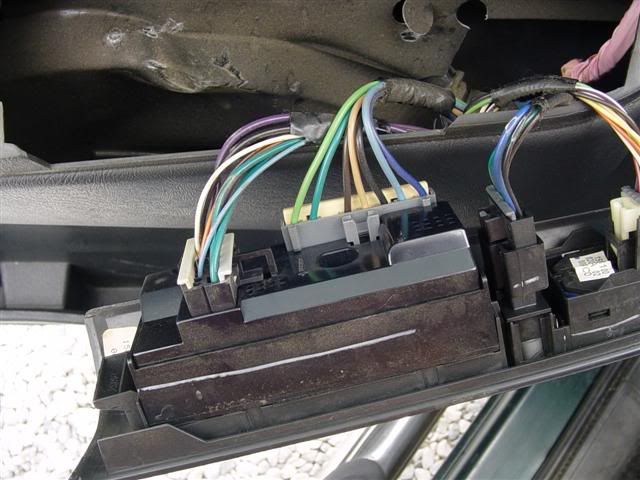
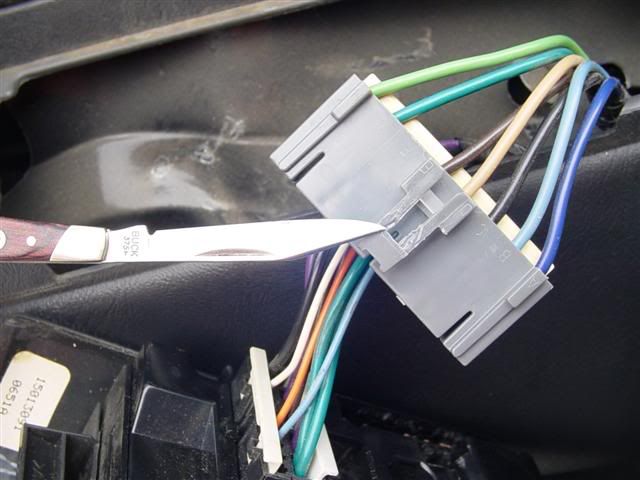
Disconnect the wire harness from the window door lock switch and power window switch by compressing the locking tabs of each switch and carefully pulling on the female end. Do not pull on the wires to avoid damage to the harness.
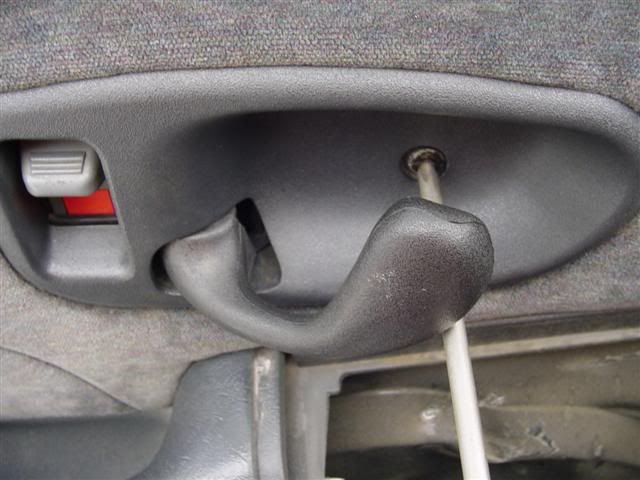
Remove the door handle cup by removing the screw behind the handle and pulling the cup towards the front of the door.
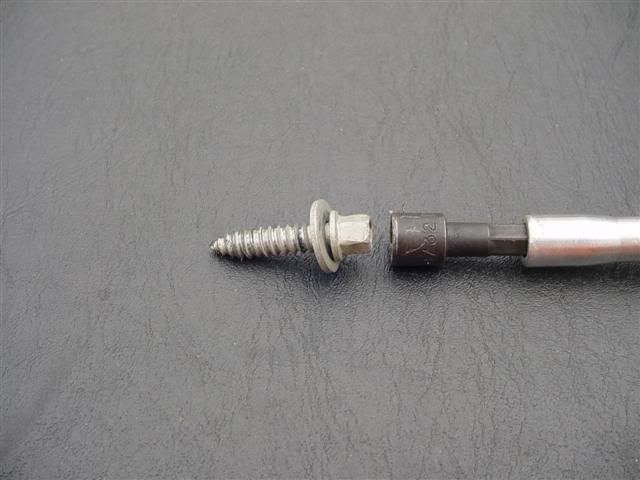
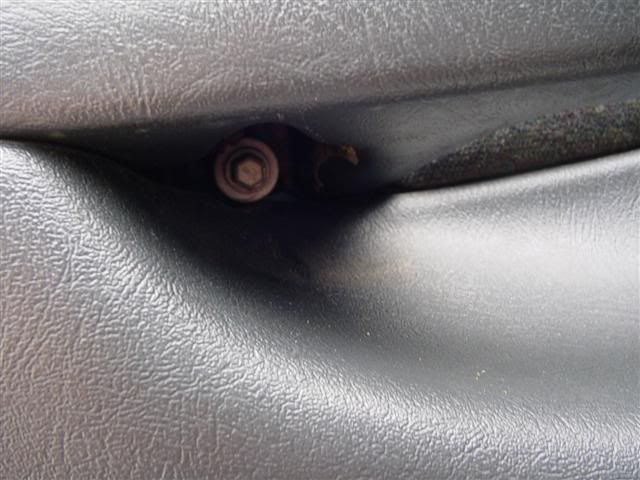
Remove the two screws under the arm rest using a 9/32 nut driver or socket.
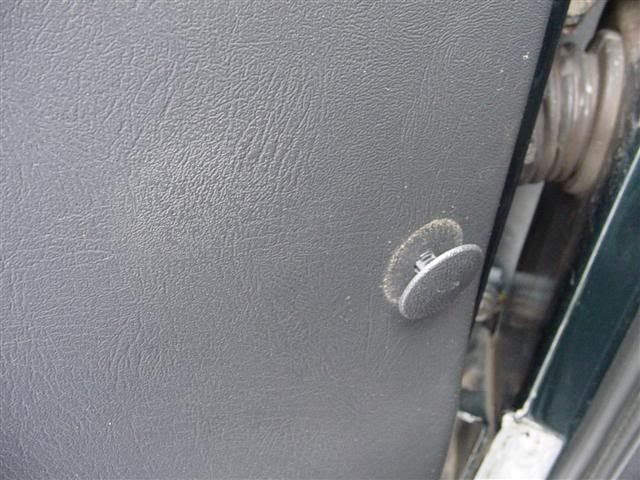
Remove the one exterior panel retainer at the front of the door using a plastic putty knife so not the scratch the door panel.
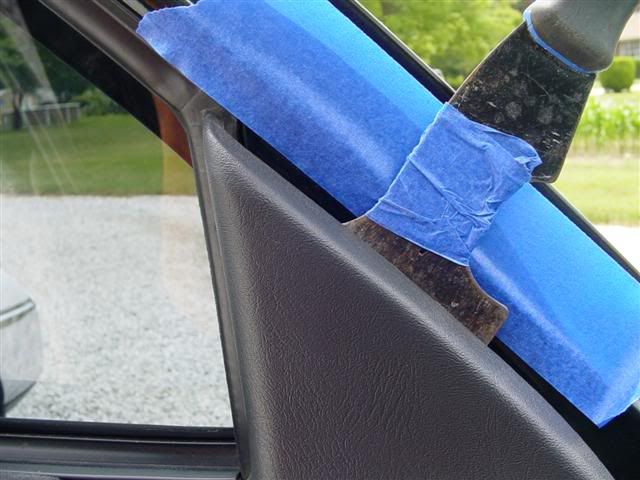
Tape around the door panel to prevent scratches to the painted surfaces.
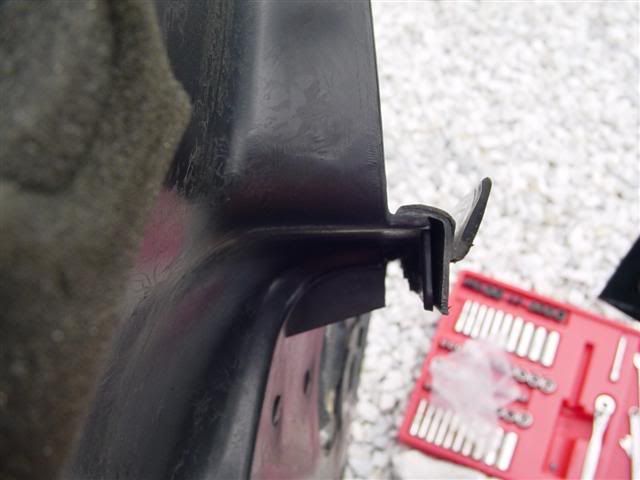
Pry the panel off starting at the lower rear corner using a heavy steel painter knife or similar tool. Work your way across the bottom of the panel then up the front side of the door to the top. It is safer to pry rite at the push clip locations to avid damage to the panel. The lower photo shows the locations. If you would break a clip they can be purchased at most auto part stores.
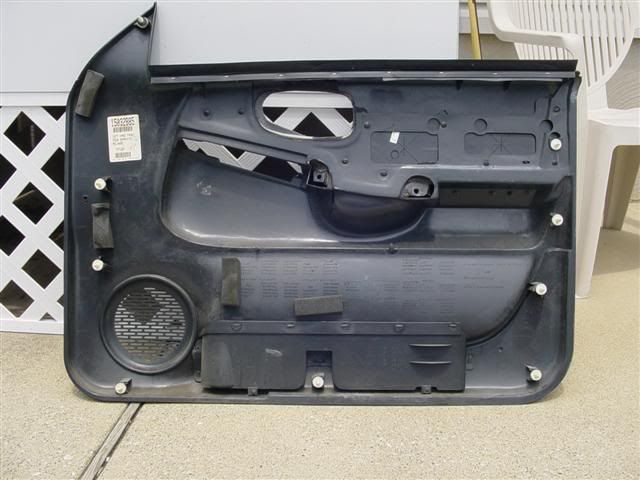
When all the clips have been pulled free the door panel can be removed by lifting the panel straight up so the upper lip of the panel will slide out from behind the inner door at the window weather stripping. The locking lip of the door panel can be seen in photo of the back side of the panel above.
Next remove the paper type door liner by carefully pulling it away. It is adhered with a black sealer that will allow you to put it back in place very easily. Start at the rear of the door and pull only enough to reveal the drive motor for the power window. You do not have to total remove the liner.
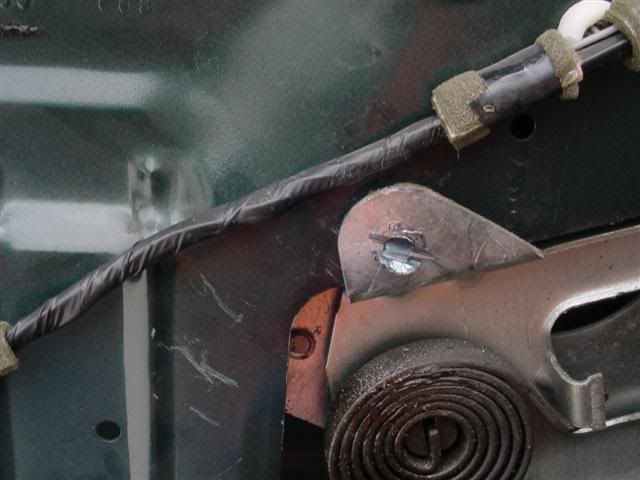
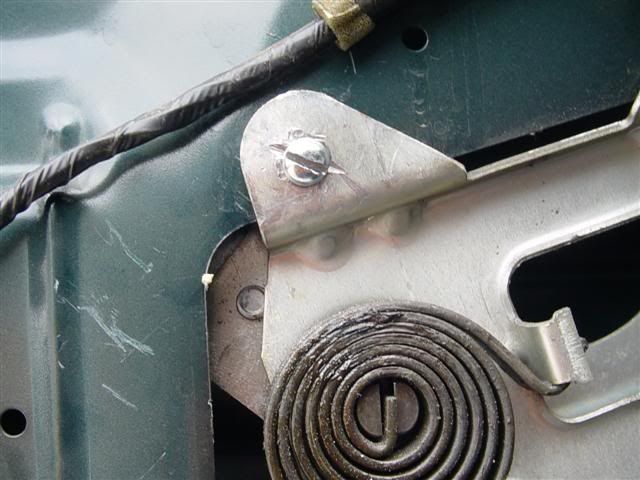
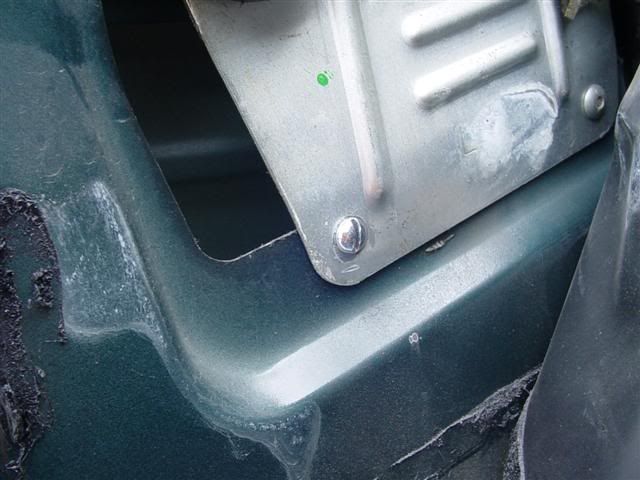
The drive motor will be in the center of the door and is mounted with four large rivets which are the cause of the problem. These rivets loosen or pull through the door panel causing the motor to flop around each time your operate the window. The solution is to remove these rivits and replace them with bolts.
To remove the rivets use a small grinder or dremel to grind off the heads then punch then through. Be certain to retrieve the fallen rivit from inside the door to prevent a rattle from the door later.
Once the rivet has been removed replace it with a 3/4 inch long 1/4 inch bolt. I used a stove bolt and locking nuts.
Once the rivies have been replaced reassemble the door by reversing the above process. The total time of the repair should be about an hour.
Loose power window motor fix.
Tools and hardware needed:
Philips screwdriver.
Plastic and heavy steel putty knife.
Hand held grinder or dremel.
9/32 nut driver or socket
Four 1/4" bolts or machine screws with locking nuts and washers.
Tape (Optional)
First remove the switch control panel by pulling up on the front of the panel then forward to free the back.
Remove the mirrow adjustment switch and the power window lock switch by unlocking the tabs on each side of the switch.
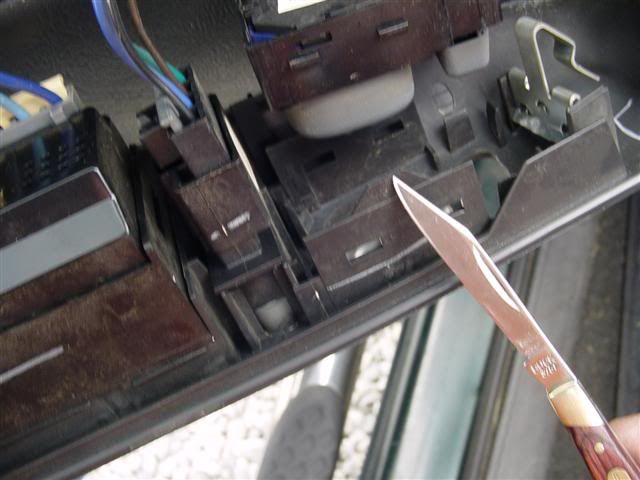
Disconnect the wire harness from the window door lock switch and power window switch by compressing the locking tabs of each switch and carefully pulling on the female end. Do not pull on the wires to avoid damage to the harness.
Remove the door handle cup by removing the screw behind the handle and pulling the cup towards the front of the door.
Remove the two screws under the arm rest using a 9/32 nut driver or socket.
Remove the one exterior panel retainer at the front of the door using a plastic putty knife so not the scratch the door panel.
Tape around the door panel to prevent scratches to the painted surfaces.
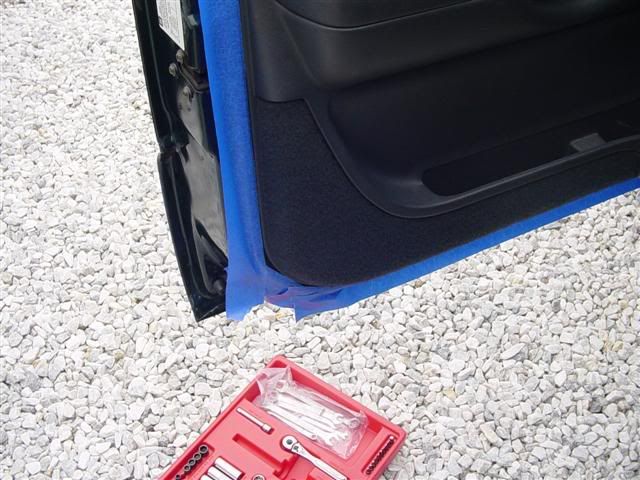
Pry the panel off starting at the lower rear corner using a heavy steel painter knife or similar tool. Work your way across the bottom of the panel then up the front side of the door to the top. It is safer to pry rite at the push clip locations to avid damage to the panel. The lower photo shows the locations. If you would break a clip they can be purchased at most auto part stores.
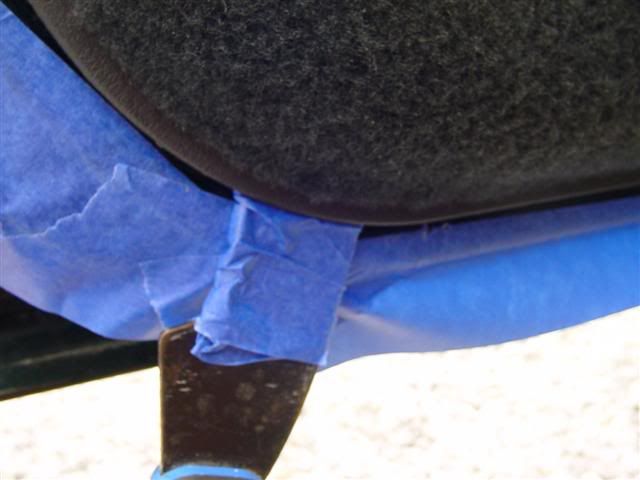
When all the clips have been pulled free the door panel can be removed by lifting the panel straight up so the upper lip of the panel will slide out from behind the inner door at the window weather stripping. The locking lip of the door panel can be seen in photo of the back side of the panel above.
Next remove the paper type door liner by carefully pulling it away. It is adhered with a black sealer that will allow you to put it back in place very easily. Start at the rear of the door and pull only enough to reveal the drive motor for the power window. You do not have to total remove the liner.
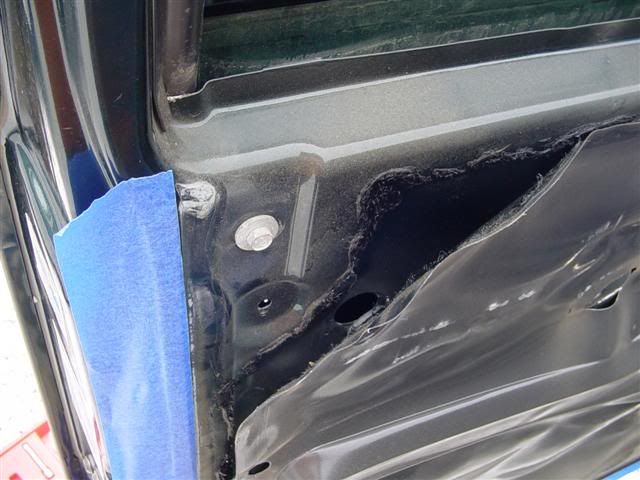
The drive motor will be in the center of the door and is mounted with four large rivets which are the cause of the problem. These rivets loosen or pull through the door panel causing the motor to flop around each time your operate the window. The solution is to remove these rivits and replace them with bolts.
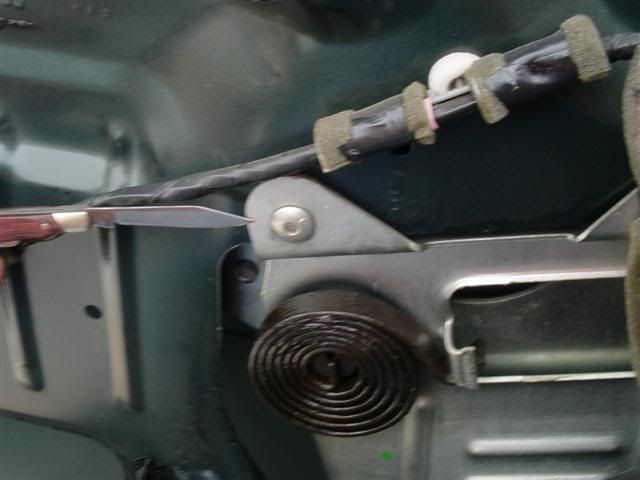
To remove the rivets use a small grinder or dremel to grind off the heads then punch then through. Be certain to retrieve the fallen rivit from inside the door to prevent a rattle from the door later.
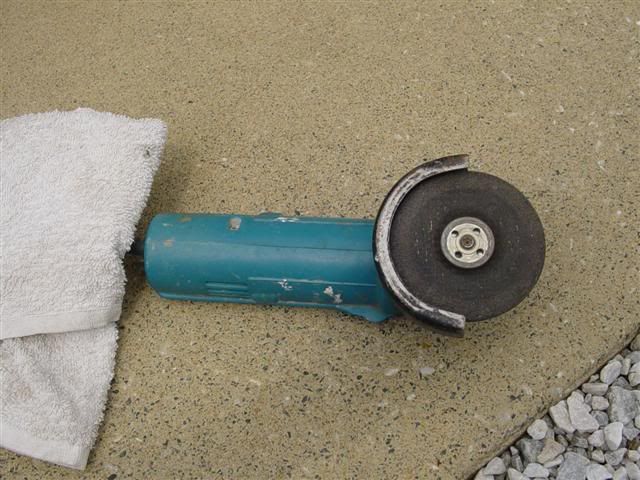
Once the rivet has been removed replace it with a 3/4 inch long 1/4 inch bolt. I used a stove bolt and locking nuts.
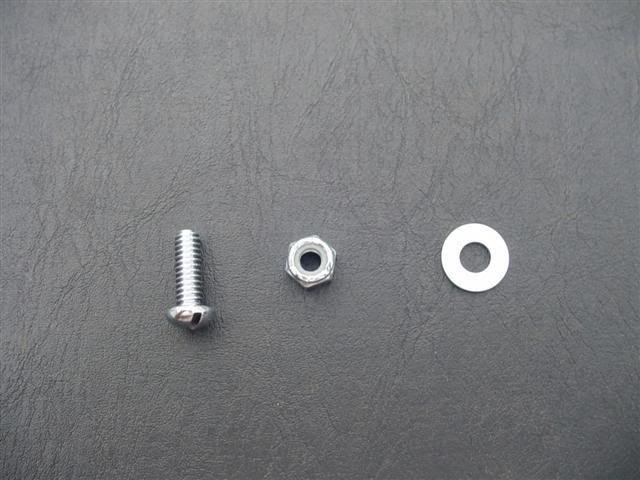
Once the rivies have been replaced reassemble the door by reversing the above process. The total time of the repair should be about an hour.
[size=75]2001 S-10 Crew , A.R.E Cap, Limo tint windows, Halogen Back up lights. Bilstein Shocks, 1.5 Rear Spacers, Summit Rear Diff Cover Clear Bumper Lights, Carbon Altezza Tail Lights, Billet Grill. SS Step Bars. GM full front bra. ,,, GM Quote concerning the gurgling heater core " They all sound like that"[/size]
- Horsehammerr
- Crew Elite
- Posts: 779
- Joined: Sun Apr 15, 2007 2:03 pm
- Location: Kimberling City, MO.
Re: Window Motor Mout Repair
BADs Crew wrote:Like others my Crew was making an annoying popping sound every time I razed or lowered the drivers side window so today I decided to make it go away.
Yep I Got That
Thanks For The Great Write Up On How To Repair It
The Crew Is Gone, Now I Have A Hoe
Thanks ..... It took more time to put the "How To" together than it did to do the job. Hopefully someone will find it useful.Horsehammerr wrote:BRAVO !!!! That is one of the best repair descriptions I have ever ,anywhere read. I was left with no questions how to do this job as an expert. Thank you Totaly BADS, for a TOTALY BAD JOB !!!
[size=75]2001 S-10 Crew , A.R.E Cap, Limo tint windows, Halogen Back up lights. Bilstein Shocks, 1.5 Rear Spacers, Summit Rear Diff Cover Clear Bumper Lights, Carbon Altezza Tail Lights, Billet Grill. SS Step Bars. GM full front bra. ,,, GM Quote concerning the gurgling heater core " They all sound like that"[/size]
Did I say something wrong here or what? No response from HJ or F9K9. Did I get kick out of the club or what?
[size=75]2001 S-10 Crew , A.R.E Cap, Limo tint windows, Halogen Back up lights. Bilstein Shocks, 1.5 Rear Spacers, Summit Rear Diff Cover Clear Bumper Lights, Carbon Altezza Tail Lights, Billet Grill. SS Step Bars. GM full front bra. ,,, GM Quote concerning the gurgling heater core " They all sound like that"[/size]
- HenryJ
- Admin K Elite
- Posts: 12705
- Joined: Tue Oct 01, 2002 9:14 pm
- Location: Ontario, Oregon
- Contact:
Sorry. Looks good to me. I can make up a mod page when time permits. I will need to cut the picture size in half first.
Thanks for all the hard work
"Speed doesn't kill, suddenly becoming stationary does." - Richard Hammond
"Speed is just a matter of Money - How fast do YOU want to go?"-Mechanic from Mad Max-
If at first you don't succeed - Don't take up Skydiving! - ThunderII KE7CSK
- 04crewvt
- Crew K Elite
- Posts: 1465
- Joined: Sat Oct 22, 2005 8:24 am
- Location: St Albans Vermont
- Contact:
That's what you get when things are so good they can't add to it, take it as a compliment you left them speechless.
[size=75]Why does the universe decree that if you have all the time in the world to work on projects you have no money and vice versa?
Green 2004 ZR-5 w/ too much to list here: http://www.cardomain.com/ride/2296465[/size]
I wasn't looking for a pat on the back. I was just use to you guys responding to a post. I know I haven't been posting a lot lately but I have been so overwhelmed at my 9 to 5 that I wasn't doing anything online but listening to my music.
I took a well needed vacation and caught my second wind. Its time I get back to work on maintaining the S-Crew.
[size=75]2001 S-10 Crew , A.R.E Cap, Limo tint windows, Halogen Back up lights. Bilstein Shocks, 1.5 Rear Spacers, Summit Rear Diff Cover Clear Bumper Lights, Carbon Altezza Tail Lights, Billet Grill. SS Step Bars. GM full front bra. ,,, GM Quote concerning the gurgling heater core " They all sound like that"[/size]
- roadrunner
- Crew K Elite
- Posts: 1267
- Joined: Wed Dec 05, 2007 5:39 pm
- Location: NW KS
Haven't needed to do this to mine (yet). But excellent info and pics. Even someone with little to no knowledge should be able to follow these directions!!!!!!!!!
2001 CC LS, pewter, stock, 4.3,Wait4meperformance, CFM throttle blade, Helix throttle body spacer, 4spd auto, 3button electric 4x4 shift, heavy duty factory suspension, Bilsteins, 1" rear wheel spacers, skid plates.
- F9K9
- Mod K Elite
- Posts: 6183
- Joined: Sun May 30, 2004 12:26 pm
- Location: London, Kentucky, United States
Excellent write up. Did you pin point the noise after you pulled the panel? Noise has never irritated me on my '97 or '02. Disconcerting was my knee being against the panel and it being moved by the PW going up and down with the panel pushing my leg inward. Peeved at the cheapness might better describe it.
[size=75][b]"For those who have fought for it, [i][color=red]FR[/color][color=white]EE[/color][color=blue]DOM[/color][/i] has a taste that the protected will never know."
[url=http://www.naxja.org/forum/showthread.php?t=73349]GUIDE TO SEARCHING. [i] (Some of the forum software is different but, it has helped me a lot.)[/i][/url][/b]
[b]"Those who don't know history are destined to repeat it." Edmund Burke[/b][/size]
[url=http://www.naxja.org/forum/showthread.php?t=73349]GUIDE TO SEARCHING. [i] (Some of the forum software is different but, it has helped me a lot.)[/i][/url][/b]
[b]"Those who don't know history are destined to repeat it." Edmund Burke[/b][/size]
- HenryJ
- Admin K Elite
- Posts: 12705
- Joined: Tue Oct 01, 2002 9:14 pm
- Location: Ontario, Oregon
- Contact:
04crewvt wrote:That's what you get when things are so good they can't add to it, take it as a compliment ...
What he said. There was nothing more for me to add. Believe it or not I don't reply to every thread, well maybe that would be hard to prove?BADs Crew wrote: I was just use to you guys responding to a post.
"Speed doesn't kill, suddenly becoming stationary does." - Richard Hammond
"Speed is just a matter of Money - How fast do YOU want to go?"-Mechanic from Mad Max-
If at first you don't succeed - Don't take up Skydiving! - ThunderII KE7CSK
The noise was the sound of the tip of the rivets popping in and out of the holes punched in the steel door. The flex in the door is definitely better but not totally gone.f9k9 wrote:Excellent write up. Did you pin point the noise after you pulled the panel? Noise has never irritated me on my '97 or '02. Disconcerting was my knee being against the panel and it being moved by the PW going up and down with the panel pushing my leg inward. Peeved at the cheapness might better describe it.
[size=75]2001 S-10 Crew , A.R.E Cap, Limo tint windows, Halogen Back up lights. Bilstein Shocks, 1.5 Rear Spacers, Summit Rear Diff Cover Clear Bumper Lights, Carbon Altezza Tail Lights, Billet Grill. SS Step Bars. GM full front bra. ,,, GM Quote concerning the gurgling heater core " They all sound like that"[/size]
Re: Window Motor Mount Repair
I know this is an old post but I thought I'd put in my two cents. I just did this fix on my 04 CC yesterday and you DO NOT need to unplug all the switches from the window control unit. It will fit through the opening with a little help.