Front sway bar quick disconnect

Fitting oversize tires, raising and lowering, suspension modifications...

Moderator: F9K9

User avatar
HenryJ
Admin K Elite
Admin K Elite
Posts: 12705
Joined: Tue Oct 01, 2002 9:14 pm
Location: Ontario, Oregon
Contact:

Front sway bar quick disconnect

Post by HenryJ »

I've been thinking about the front sway bar. It is definately an advantage to have it disconnected offroad for increased front articulation.


I did a search for Paul's modifications and couldn't find the information.


I came across some info on a Jeep center mounted quick disconnect . Although it is a neat idea , it might be a little inconvenient with our front shield.

Image

I could see something like this working, with a little modification. It needs a groove in the inner pin for a roll pin through the outer housing , so it won't try to seperate. And I'd build it out of steel so it could be welded to the bar, and add a bronze bushing.


I like the wing nut idea, but I'm a little concerned about the stud and bushings being left on the lower a-arms. Also could a bracket be built to hold it up while disconnected or does it have to be removed?


Paul any chance of some photos and a little write-up?


Any information is greatly appreciated :D

"Speed doesn't kill, suddenly becoming stationary does." - Richard Hammond
"Speed is just a matter of Money - How fast do YOU want to go?"-Mechanic from Mad Max-
If at first you don't succeed - Don't take up Skydiving!
- ThunderII KE7CSK
User avatar
a2b
Mod K Elite
Mod K Elite
Posts: 1765
Joined: Wed Oct 02, 2002 11:20 pm
Location: Los Angeles
Contact:

Post by a2b »

my ? is....its still IFS. its not like a jeep where you take the sway bar off of a SFA. i mean, how much more flex will it give that will actually help and be worth taking off?
[size=75] -HOBIE

^^^^^^^^^^^^^^^^^| ||__\
| ##Budweiser ###### | ||''|"\,__.
|_...__...________ ====| |__|__|...]
"(@)'(@)""""**|(@)(@)******(@)I[/size]
User avatar
HenryJ
Admin K Elite
Admin K Elite
Posts: 12705
Joined: Tue Oct 01, 2002 9:14 pm
Location: Ontario, Oregon
Contact:

Post by HenryJ »

Even an inch can make all the difference to some people. I'm sure that it would be more than that though.

With the sway bar connected when you compress one side , it tries to compress the other side as well , lowering the front ground clearance.

Disconnected they truly are independent. ( a good thing in the rocks, and ruts )

"Speed doesn't kill, suddenly becoming stationary does." - Richard Hammond
"Speed is just a matter of Money - How fast do YOU want to go?"-Mechanic from Mad Max-
If at first you don't succeed - Don't take up Skydiving!
- ThunderII KE7CSK
User avatar
a2b
Mod K Elite
Mod K Elite
Posts: 1765
Joined: Wed Oct 02, 2002 11:20 pm
Location: Los Angeles
Contact:

Post by a2b »

nope, if it compresses one side, i want it to decompress the other side. just like a SFA. other wise it will increase roll over chances. and like you said, it lowers the front diff, and thats always very bad news
[size=75] -HOBIE

^^^^^^^^^^^^^^^^^| ||__\
| ##Budweiser ###### | ||''|"\,__.
|_...__...________ ====| |__|__|...]
"(@)'(@)""""**|(@)(@)******(@)I[/size]
User avatar
quickbiker
Crew K Elite
Crew K Elite
Posts: 1575
Joined: Fri Oct 11, 2002 6:01 pm
Location: VA
Contact:

Post by quickbiker »

I know everyone has their preferences, so it's whatever works for you. I've found that it's like a difference of night and day when I disconnect. When I am connected, I feel like a bouncing ball and being jarred to heck on rock trail or any trail, also my wheels lift up allot more. When I disconnect, I just glide over rocks and don't feel much swaying or bouncing at all, it's like I just float over the rocks. And being connected increases the chance of tipping that much more, cause your front will follow whatever you give it. Disconnected it will soak up some of that sway, and yes, it will truely be independent. Believe me, I've tried both ways, and I will always disconnect on trails. I like to get all the advantage I can.


And with my wing nut setup, I don't use that anymore. I still haven't figured a really great and quick way to disconnect. I did shorted both the link bolts and the swaybar mounting bolts to as short as I can get them, so I can take it off in the shortest time. I always ubolt my whole sway bar, including the TM drop brackets and through it in my bed. After doing this, I have maximum aproach angle.


I know there is a good way to do it, I have it planned in my head. One of my ideas is to weld some brackets to the lower control arm and have the end hole of it forward and up. Then mount the stock sway bar in stock location, without the TM drop brackets and use disconnect links. That way I can move it forward and bungee to front bumper like I used to do what I was stock. But for now, taking it off is easy enough for now I guess. :roll:


I have heard of those middle split disconnect thingy, but I still need to remove my TM drop brackets, cause I get into some hairy approaches on rocks, and end up smashing them up every time. :lol:
[size=75][url=http://outsideventure.com/s10crew/]01 S10 Crewcab - SAS'd[/url][/size]
User avatar
a2b
Mod K Elite
Mod K Elite
Posts: 1765
Joined: Wed Oct 02, 2002 11:20 pm
Location: Los Angeles
Contact:

Post by a2b »

well, if it improves front end hop, then it must take some stress of that IFS and therefore it is well worth disconnecting it
[size=75] -HOBIE

^^^^^^^^^^^^^^^^^| ||__\
| ##Budweiser ###### | ||''|"\,__.
|_...__...________ ====| |__|__|...]
"(@)'(@)""""**|(@)(@)******(@)I[/size]
User avatar
Warnoffroad
Crew Elite
Crew Elite
Posts: 477
Joined: Sun Jan 19, 2003 6:04 pm
Location: Winter Springs Florida
Contact:

Post by Warnoffroad »

I dont know if your not big into rocks would it be worth the money and the time on our trucks :?:
User avatar
quickbiker
Crew K Elite
Crew K Elite
Posts: 1575
Joined: Fri Oct 11, 2002 6:01 pm
Location: VA
Contact:

Post by quickbiker »

warnoffroad wrote:I dont know if your not big into rocks would it be worth the money and the time on our trucks :?:


Can't get away from rocks here, especially in the mountains, and I like them! :D
[size=75][url=http://outsideventure.com/s10crew/]01 S10 Crewcab - SAS'd[/url][/size]
User avatar
Warnoffroad
Crew Elite
Crew Elite
Posts: 477
Joined: Sun Jan 19, 2003 6:04 pm
Location: Winter Springs Florida
Contact:

Post by Warnoffroad »

Yeah I love rocks and hills but we dont have any down here :cry: but the mud is always fresh 8)
User avatar
a2b
Mod K Elite
Mod K Elite
Posts: 1765
Joined: Wed Oct 02, 2002 11:20 pm
Location: Los Angeles
Contact:

Post by a2b »

hey paul, did you ever disconnnect it when you where stock?
[size=75] -HOBIE

^^^^^^^^^^^^^^^^^| ||__\
| ##Budweiser ###### | ||''|"\,__.
|_...__...________ ====| |__|__|...]
"(@)'(@)""""**|(@)(@)******(@)I[/size]
User avatar
quickbiker
Crew K Elite
Crew K Elite
Posts: 1575
Joined: Fri Oct 11, 2002 6:01 pm
Location: VA
Contact:

Post by quickbiker »

a2b wrote:hey paul, did you ever disconnnect it when you where stock?


Yea, all the time. Actually, it was much easier when I was stock. I only took the end links off and flipped in forward and bungeed it to the front bumper. :lol:
[size=75][url=http://outsideventure.com/s10crew/]01 S10 Crewcab - SAS'd[/url][/size]
User avatar
a2b
Mod K Elite
Mod K Elite
Posts: 1765
Joined: Wed Oct 02, 2002 11:20 pm
Location: Los Angeles
Contact:

Post by a2b »

quickbiker wrote:
a2b wrote:hey paul, did you ever disconnnect it when you where stock?


Yea, all the time. Actually, it was much easier when I was stock. I only took the end links off and flipped in forward and bungeed it to the front bumper. :lol:


alirght, well i am going to try it out on my next trip :wink:
[size=75] -HOBIE

^^^^^^^^^^^^^^^^^| ||__\
| ##Budweiser ###### | ||''|"\,__.
|_...__...________ ====| |__|__|...]
"(@)'(@)""""**|(@)(@)******(@)I[/size]
User avatar
HenryJ
Admin K Elite
Admin K Elite
Posts: 12705
Joined: Tue Oct 01, 2002 9:14 pm
Location: Ontario, Oregon
Contact:

Post by HenryJ »

I happened to notice a members ZR2 had a slick method of carrying his disconnected sway bar.
Maybe He will share a photo and tells us what he has done.

"Speed doesn't kill, suddenly becoming stationary does." - Richard Hammond
"Speed is just a matter of Money - How fast do YOU want to go?"-Mechanic from Mad Max-
If at first you don't succeed - Don't take up Skydiving!
- ThunderII KE7CSK
User avatar
Blaze One
Crew Elite
Crew Elite
Posts: 410
Joined: Thu Jul 14, 2005 5:05 pm
Location: BC Canada

Post by Blaze One »

Geeeezzz... i don't know about this forum , it is bad news to my wallet . Everytime i log in , i find some other mod. to spend my money on .

Anyway's , this is a great mod , even for ifs . And it is worth it on even our front ends , since it should only take minutes to disconnect and that is a small price (time) to pay for a couple ours on a trail . You could do it in less time that it takes to air down .

I have seen some quick disconects on a few tacoma sites , and there suspension Flex or Droop is greatly increased . Even 2" is worth alot on a rocky trail . I don't know how much it would be on our ifs though .

Also , could this quick disconnect be utilized to work on a Rear sway bar setup too . I know some have the rear sway mod. already .
[size=75]1995 Chevy Blazer 2dr 4x4 Limited Edition [/size]
jeggers
Crew Elite
Crew Elite
Posts: 489
Joined: Wed Dec 08, 2004 7:38 pm
Location: bolingbrook, il

Post by jeggers »

I have been thinking of doing this myself, here is my motivation.
Muslhed's photo

Link't over limit pic -HJ
2001 cc 2" pa body lift traded
2004 cc zr5 2" pa body lift 6" super lift 2" rear shackle and tb crank traded for a v-max Silverado
2006 V-max cc
2001 ex cab 4x4 ls work truck rufff country 2" lift sold
2012 silverado WT 2wd
jeggers
Crew Elite
Crew Elite
Posts: 489
Joined: Wed Dec 08, 2004 7:38 pm
Location: bolingbrook, il

Post by jeggers »

link

and again :roll: -HJ
2001 cc 2" pa body lift traded
2004 cc zr5 2" pa body lift 6" super lift 2" rear shackle and tb crank traded for a v-max Silverado
2006 V-max cc
2001 ex cab 4x4 ls work truck rufff country 2" lift sold
2012 silverado WT 2wd
User avatar
Walt
Admin K Elite
Admin K Elite
Posts: 1556
Joined: Thu Jan 22, 2004 11:27 pm
Location: Mize, MS

Post by Walt »

WoW :D This motivates me also!

I have an idea I've been toying with that would be relatively easy to install and perform.

Could a Hitch Pin be used? Or do the endlinks have to be compressed by tightening a bolt for the sway bar to do it's job?
--Walt
2001 S-10 CrewCab - Retired...
User avatar
Blaze One
Crew Elite
Crew Elite
Posts: 410
Joined: Thu Jul 14, 2005 5:05 pm
Location: BC Canada

Post by Blaze One »

Holy shamoly ! , i didn't expect that kinda flex from just discoing the sway's . I say it is a mod well worth the price for some hardware ! . can't wait to see the final product(s)
[size=75]1995 Chevy Blazer 2dr 4x4 Limited Edition [/size]
User avatar
killian96ss
Crew K Elite
Crew K Elite
Posts: 2669
Joined: Tue Sep 09, 2003 11:53 am
Location: Sacramento, California

Post by killian96ss »

Have you guys seen the electronic disconnect sway bar on the new Dodge Power Wagon?

2005 Dodge Power Wagon in Four Wheeler Magazine

Image

Sway Bar Connected
Image

Disconnected
Image

Dash Switch For Sway Bar And Rear Diff
Image

This is by far the best sway bar disconnect I have ever seen. :D

Steve
User avatar
Blaze One
Crew Elite
Crew Elite
Posts: 410
Joined: Thu Jul 14, 2005 5:05 pm
Location: BC Canada

Post by Blaze One »

Supposedly the new 07 rubicon will have this option aswell , only time will tell how reliable it is , seems to me that that first year electronic stuff has some bugs that will need to be worked out . Very Cool though .
[size=75]1995 Chevy Blazer 2dr 4x4 Limited Edition [/size]
User avatar
Walt
Admin K Elite
Admin K Elite
Posts: 1556
Joined: Thu Jan 22, 2004 11:27 pm
Location: Mize, MS

Post by Walt »

So does anyone think my idea will work? Using hitch pins or something similar?
--Walt
2001 S-10 CrewCab - Retired...
User avatar
HenryJ
Admin K Elite
Admin K Elite
Posts: 12705
Joined: Tue Oct 01, 2002 9:14 pm
Location: Ontario, Oregon
Contact:

Post by HenryJ »

I think it will cut or shear the pin. The bar diameter is not big enough to drill a large enough hole for a large enough pin to resist being sheared.
The next problem would be access. I assume that you would cut the center. Are you going to run without a steering shield?
Next problem. Disconnected what keeps the bar from separating? It might be a pain to try to pin afterward?

Building a piece like the first post might be an option, but I don't know how well it would work. I don't know anyone who has one.

I sure wish Muslhed would chime in with what he has done. The double clevis method of stowing the bar looks like a good idea.

"Speed doesn't kill, suddenly becoming stationary does." - Richard Hammond
"Speed is just a matter of Money - How fast do YOU want to go?"-Mechanic from Mad Max-
If at first you don't succeed - Don't take up Skydiving!
- ThunderII KE7CSK
User avatar
Snoman002
Crew Elite
Crew Elite
Posts: 191
Joined: Sat Nov 26, 2005 2:13 pm
Location: Ohio

Post by Snoman002 »

WOW, I was just thinking of this last night and wham, here is a post on it. I want to get the 91 out and wheel it when its back up and running, but two open diffs and IFS is just asking for trouble. Judging from muslhed's pics disconnecting the sway bar would make a HUGE difference. Unfortnatly the sway bar on mine connects to the bottom of the LCA so just unbolting it from the arm is not as simple as disconnecting the links.

If a system like first pictured is used all that would be needed to access it would be a small (2" maybe) hole in the skid plate, not really enough to cause issues IMO. I think a system like that holds the most merit for me. You guys on the other hand I would think a seperatable end link would be the best. I have a design in my head tha I just cant seem to get down with words, the problem with what I'm thinking of though is it would require custom machine work, not alot, but some. That gets expensive fast.

HJ, I know what you mean with the pins breaking. You might be able to use a couple though to get enough strength. If you take a look at the pin in the pic at the top, that thing is dang small. I would mostly be worried about the holes deforming and causing the bar to loosen over time. If you did break a pin though it would only happen at a very bad time and would probably result in a roll over, not sure it's something I would risk, even if a whole bunch of pins were used.

Now if I could ever get my hydro-pneumatic bypass shock/sway bar system prototyped then I would have something for you guys :D . Fully adjustable and possibly even a forced articulation system that could even be doubled to provide an anti dive system To bad that will never happen :( .

:lol:
[size=75][b]1991 GMC Sonoma Extended Cb[/b] - 4.3L Automatic, 2" BL, 31" BFG's.
[b]1992 Chevy T-10 Reg Cab[/b] - 4.3L 5spd, 3" Bl, 31" Mud Tires. Hooker long tube headers and true duals.
[b]1999 Oldsmobile Bravada[/b] - Wifes truck, all stock.[/size]
User avatar
Walt
Admin K Elite
Admin K Elite
Posts: 1556
Joined: Thu Jan 22, 2004 11:27 pm
Location: Mize, MS

Post by Walt »

Ok, after looking at Muslhed's setup, I think I'm gonna try it that way :)
--Walt
2001 S-10 CrewCab - Retired...
User avatar
Blaze One
Crew Elite
Crew Elite
Posts: 410
Joined: Thu Jul 14, 2005 5:05 pm
Location: BC Canada

Post by Blaze One »

If you look at Muslhed's gallery ( link is in his sig. ) you can find a couple of close up's of his sway disco setup , seems fairly simple too . Although , I still don't know what parts are needed , or if this could be don't with the rear swaybar aswell .
[size=75]1995 Chevy Blazer 2dr 4x4 Limited Edition [/size]
User avatar
Snoman002
Crew Elite
Crew Elite
Posts: 191
Joined: Sat Nov 26, 2005 2:13 pm
Location: Ohio

Post by Snoman002 »

I couldn't see any closeups of the sway bar setup, am I missing something? DOH, never mind I found it.

There were some good pics there though. I like the comparison of these two shots. I'm guessing that in the first one the stock sway bar is still connected.

Image

Image
[size=75][b]1991 GMC Sonoma Extended Cb[/b] - 4.3L Automatic, 2" BL, 31" BFG's.
[b]1992 Chevy T-10 Reg Cab[/b] - 4.3L 5spd, 3" Bl, 31" Mud Tires. Hooker long tube headers and true duals.
[b]1999 Oldsmobile Bravada[/b] - Wifes truck, all stock.[/size]
User avatar
Blaze One
Crew Elite
Crew Elite
Posts: 410
Joined: Thu Jul 14, 2005 5:05 pm
Location: BC Canada

Post by Blaze One »

yep i believe so , in the first pic , you can see that the bar is still flipped back ( connected ) , later in some shots , you can acutally see the bar flipped forward(disco'd) and held there with something .
I have a feeling that there are some people in the "backgroud" 8) of this thread doing some research , that is why we are not getting any new info at the moment . We'll see though .


ok i found a good discussion going on here about there disco's .

http://www.zr2usa.com/mboard/index.php?showtopic=4591

And here is another thread about it too , with a parts list
http://forum.zr2.com/cgi-bin/ultimatebb ... 770#000000

BTW , how many people are looking at the pics on Muhsleds site , it says there is too much traffic and the site page is unavailable :shock:
[size=75]1995 Chevy Blazer 2dr 4x4 Limited Edition [/size]
User avatar
Snoman002
Crew Elite
Crew Elite
Posts: 191
Joined: Sat Nov 26, 2005 2:13 pm
Location: Ohio

Post by Snoman002 »

Here is what I wrote over at ZR2.com
I can't wait to figure this out for my 91. Unfortunatly my sway bar connects to the bottom of the LCA and there is no way to remove it easily. I thought about a center dissconnect but the BIG problem with that is because the mouting points on the LCA are so far outside the mounting points on the frame there is going to be ALOT of load against the sides of any pipe sliped over the sway bar. It may work for a while but it is going to wear things out VERY fast. Also, there is a HUGE force on any pins through the bar, even with grade 8 (since they would have to be small) it is possible they would fail, and if they fail in an emergency your body will snap roll. They will also oblong the holes you drilled through the bar fairly quickly (that metal isn't hardened as far as I know). Once it oblongs a little it is going to get worse and worse, faster and faster. The only way I see that working well is if a flange type connect is used and the bar inside is supported with bushings. Thus the bushings take the wear and the three or four bolts on the flange undergo FAR less sheer stress due to the increase bolts, a larger bolt can be used, and the sheer force is further from the center of the bar.

Also, I think the reason the truck don't flex as well is because the rear (nothing new, I know). but how it works is where I disagree. Because the rear has less weight IT does not articulate as well. Since it does not articulate as well it tends to force the body over on it's side and that places a side load on the suspension. This makes it appear that the front is not articulating as well, but since the weight of the truck is forcing the tire "in" there is less force forcing the tire upward. Since the truck has greater weight on the front (assuming similar weight to the blazer but say a 70/30 distrabution) that means if the body of the truck is level the front will articulate better than the blazer, more uptravel of the "high" wheel and less down travel of the "low" wheel in the same situation. BUT since the rear has less weight it twists the body of the truck more, over smaller obsticals, and it places more side load on the front suspension instead of "up" load, but since the weight of the truck stays the same that just means the less weight acts in a manner to compress the suspension (thus seemingly less articulation). The only way to fix this is to lower the spring rate in the rear. That probably means softer springs and then maybe extended shackels to maintain the ride height. This would effectivly lower the hauling capacity of the truck though.

I also disagree with the statement that removing the sway bar increases suspension travel. Yes their may be a small bit of binding due to the sway bar but their is BY FAR enough load on the t-bars to fully top out the suspension (resting on the top out stops) when both front wheels are off the ground. Also, since the bump stop stays the same there can be no more upward travel, and I know you can hit the bump stops on these truck. So because both the up travel and the down travel cannot change due to the suspension stops, and since the suspension will hit either of these stops even with the sway bar, travel cannot increase by removing the sway bar.


And finally, I ABSOLUTLY POSITIVLY do not reccomend running without the front sway bar. I have seen regular blazers come extreemly close to rolling in an emergency, removing the sway bar will definatly increase body roll in an abrupt lane change and you will absolutly decrease the threshold at which your vehicle will roll. Unless you are positivly willing to roll your vehicle you will not put it in a situation similar to an actual emergency. Doing fast lane changes is fine but it is no where near what you will do in an emergency. I have seen S-Series blazers come within a hair of rolling (was able to see under the inside tires) and in that case not having a sway bar would have resulted in a rollover, I have NO doubt of that. The rear sway is a little difference, that is more so to provide stability in quick moves. Also, I don't see the rear sway adding alot of stability towing, since the hitch is near inline with the center of the axle, side to side pressure of the trailer contributes very little to body roll. Putting extra people or some heavy things in the back though will result in a difference as the weight (and force) is above the center of the axle.

Sorry for the LONG post.

Great job, now I just need to figure something out for my truck. Maybe I'll just swap to later model lower controll arms and sway bar, if it isnt too expensive.
[size=75][b]1991 GMC Sonoma Extended Cb[/b] - 4.3L Automatic, 2" BL, 31" BFG's.
[b]1992 Chevy T-10 Reg Cab[/b] - 4.3L 5spd, 3" Bl, 31" Mud Tires. Hooker long tube headers and true duals.
[b]1999 Oldsmobile Bravada[/b] - Wifes truck, all stock.[/size]
User avatar
HenryJ
Admin K Elite
Admin K Elite
Posts: 12705
Joined: Tue Oct 01, 2002 9:14 pm
Location: Ontario, Oregon
Contact:

Post by HenryJ »

A center disconnect would definitely be a better choice for a first gen.
The thoughts about articulation are a little "off" IMO. The rear of our trucks articulates great. Look at the shots Hobie and Justin have done , as well as some of mine. The rear of these trucks really rock...literally. The front suspension is our limiting factor.

The sway bar does in fact limit the independent movement of the front suspension. It does not stop the truck from full travel, stop to stop. When one side is compressed it tries to pull up , or compress the other side as well. This limits the wheel drop on the off side while articulating.
I am sure you understand that as you do seem to grasp the systems function.
I do agree that a sway bar is nice for on road operation. You could run with out one, but as with lifting, changing wheels , tires, shocks, etc, all modifications will alter the factory handling characteristics. Extreme caution is in order.
I think there is a way to fab a reasonable disconnect. The pipe idea is a start, but you are all right that the small pins are not going to work.

I am hesitant to give all the details, but I guess much like Barch's "lid'oon" eating storage utensil, no one will likely steal the idea for profit.

Here goes. Cut the bar in half. Two keys much like the torsion bar "porkchops" are cut. One fits tightly over the bar and has a hole in the other end. This is slipped over one bar and back a couple inches to be welded in place. The next key slips over a piece of pipe twice the length that the first key is from the end of the opposing bar and is welded to one end of the pipe. This pipe is slipped over the bar and the plates mate. A groove in the bar keeps the bars from separating and the pipe uses a set screw to keep the bars together while disconnected. The other end of the pipe is then welded to the bar. A grease zerk is tapped into the pipe for lubrication.
To understand how these will function, place your hands together palm to palm. hold your arms straight and parallel. Rotate you arms independently. This is what it would do unlatched. Lock your fingers and the bar rotates as one.
Now, this all needs to be easy to operate, so I want an electronic latch pin. A simple solenoid can be attached to one plate with a large diameter hardened pin. Throw power to it and the pin recedes unlocking the plates for the bar to disconnect. kill the power and it latches. The plates would be wide enough to prevent the latch pin from being engaged in the out position, and spring loaded so that it will automatically engage when the bar aligns.
You would have to anticipate the situation needing the bar disconnected since I doubt it would easily disconnect under load.

Pin size, plate and pipe thickness as well as key length can be adjusted for strength and clearances. It would have to be positioned and clocked in a position that has enough clearance.

Maybe someday when I have some spare time. :mg:

"Speed doesn't kill, suddenly becoming stationary does." - Richard Hammond
"Speed is just a matter of Money - How fast do YOU want to go?"-Mechanic from Mad Max-
If at first you don't succeed - Don't take up Skydiving!
- ThunderII KE7CSK
User avatar
killian96ss
Crew K Elite
Crew K Elite
Posts: 2669
Joined: Tue Sep 09, 2003 11:53 am
Location: Sacramento, California

Post by killian96ss »

You guys are making this way too difficult! :lol: Brule, your idea is exactly what Dodge did with the new Powerwagon in the pictures I posted above. :wink: I don't think it would be a good idea to cut a sway bar in half for a couple of reasons. Sway bars are made of spring steel and are designed to twist a certain amount. Our sway bar is rather large and is designed to handle a large amount of stress. One you cut the bar you are changing it's design and creating a huge weak point for something to break. Obviously it can be done since Dodge and Jeep each have a version of the same idea, but the most important factor here is safety, which I'm sure both companies invested a lot of time & money into these designs. Here is the simplest idea I have seen and it could easily work on our trucks! :D

Image

This one is made by Persson's Offroad Systems. They are custom made out of stainless steel to the correct length, and include Energy Suspension bushings. The only downside is that they run about $100 shipped. :shock: They are nice though! 8)

Steve
Last edited by killian96ss on Thu Mar 30, 2006 9:23 pm, edited 1 time in total.
User avatar
HenryJ
Admin K Elite
Admin K Elite
Posts: 12705
Joined: Tue Oct 01, 2002 9:14 pm
Location: Ontario, Oregon
Contact:

Post by HenryJ »

killian96ss wrote:...Here is the simplest idea I have seen and it could easily work on our trucks!
Too long for our trucks and would kill ground clearance. Then you still have to swing the bar forward and attach it somehow.

Some wing nuts and a bungie cord is simple. Complicated is much more fun :mg:

Oh, I am not too worried about modifying or cutting sway bars. I have built a few in my time. Cutting it will alter its characteristics, of that there is no doubt.
Last edited by HenryJ on Thu Mar 30, 2006 9:36 pm, edited 1 time in total.

"Speed doesn't kill, suddenly becoming stationary does." - Richard Hammond
"Speed is just a matter of Money - How fast do YOU want to go?"-Mechanic from Mad Max-
If at first you don't succeed - Don't take up Skydiving!
- ThunderII KE7CSK
User avatar
Blaze One
Crew Elite
Crew Elite
Posts: 410
Joined: Thu Jul 14, 2005 5:05 pm
Location: BC Canada

Post by Blaze One »

Wow , your actually thinking of making a ELECTRONIC sway disco' ?!? , I guess you don't take the easy way out do you , this will definetly be something to see if you do make it .
I myself will just using the above mentioned method , after i do my mild lift and larger tires . Hopefully i will beable to measure the before and after , so we can see what gains I get .
[size=75]1995 Chevy Blazer 2dr 4x4 Limited Edition [/size]
User avatar
killian96ss
Crew K Elite
Crew K Elite
Posts: 2669
Joined: Tue Sep 09, 2003 11:53 am
Location: Sacramento, California

Post by killian96ss »

HenryJ wrote:Too long for our trucks and would kill ground clearance. Then you still have to swing the bar forward and attach it somehow.
"They are custom made out of stainless steel to the correct length" The picture is only an example of what they look like, not the only size available. :wink: Pulling 4 pins and securing the sway bar up front doesn't seem very hard to me. :D I wonder how much the Dodge electric sway bar unit would cost? Maybe it could be adapted to our sway bar? 8)

Steve
User avatar
HenryJ
Admin K Elite
Admin K Elite
Posts: 12705
Joined: Tue Oct 01, 2002 9:14 pm
Location: Ontario, Oregon
Contact:

Post by HenryJ »

killian96ss wrote:..."They are custom made out of stainless steel to the correct length"...
Do some checking. I think you will find that they are not available for our trucks and are designed for top side bars. Ours are very short and do not leave room for such a device.

If you want to do that , just add a wing nut or pack a wrench and drop the link.

"Speed doesn't kill, suddenly becoming stationary does." - Richard Hammond
"Speed is just a matter of Money - How fast do YOU want to go?"-Mechanic from Mad Max-
If at first you don't succeed - Don't take up Skydiving!
- ThunderII KE7CSK
User avatar
killian96ss
Crew K Elite
Crew K Elite
Posts: 2669
Joined: Tue Sep 09, 2003 11:53 am
Location: Sacramento, California

Post by killian96ss »

HenryJ wrote:
killian96ss wrote:..."They are custom made out of stainless steel to the correct length"...
Do some checking. I think you will find that they are not available for our trucks and are designed for top side bars. Ours are very short and do not leave room for such a device.

If you want to do that , just add a wing nut or pack a wrench and drop the link.
Your right that no one makes one for our truck, however I don't think it would be all that hard to raise the lower a-arm mount an inch or so to accommodate a shorter version of the disconnect I pictured that is for a Toyota. There is no way in hell I could get a wing nut as tight as I have my bushings cranked down, nor do I want something that I have to break out the wrenches to take off. I want something simple and fast. :wink:

Steve
User avatar
HenryJ
Admin K Elite
Admin K Elite
Posts: 12705
Joined: Tue Oct 01, 2002 9:14 pm
Location: Ontario, Oregon
Contact:

Post by HenryJ »

killian96ss wrote:...I want something simple and fast.
Agreed.
Moving the mount is an idea. The amount it would need to be moved will be an issue though.
if you plan to go to that route I would change the arm mount to a pin and use a captured bushing and sleeve. These are much easier to align for reconnection. If the sway bar could be repositioned above the a-arm something like that might work.
You would have to look into the possibility of swinging it up to stow. There may not be room to do so?

"Speed doesn't kill, suddenly becoming stationary does." - Richard Hammond
"Speed is just a matter of Money - How fast do YOU want to go?"-Mechanic from Mad Max-
If at first you don't succeed - Don't take up Skydiving!
- ThunderII KE7CSK
User avatar
killian96ss
Crew K Elite
Crew K Elite
Posts: 2669
Joined: Tue Sep 09, 2003 11:53 am
Location: Sacramento, California

Post by killian96ss »

Here is another picture of that Dodge electric disconnect. :D

Image

I find it interesting that Dodge decided to mount the disconnect system off to one side. :? I would think this would cause different spring rates for each side since the drivers side has a longer section of bar which would enable it to twist more than the passenger side when in the locked position. My guess is that they had to mount it there for interference problems. :?

Steve
User avatar
HenryJ
Admin K Elite
Admin K Elite
Posts: 12705
Joined: Tue Oct 01, 2002 9:14 pm
Location: Ontario, Oregon
Contact:

Post by HenryJ »

killian96ss wrote:...I find it interesting that Dodge decided to mount the disconnect system off to one side. :? I would think this would cause different spring rates for each side since the drivers side has a longer section of bar which would enable it to twist more than the passenger side when in the locked position. My guess is that they had to mount it there for interference problems.
The disconnect can be at any point and not affect the spring rate. The disconnect point is not a fixed point for the bar.
The bar is twisted from each end and is only one spring , not two.
Blaze One wrote:Wow , your actually thinking of making a ELECTRONIC sway disco' ?!? , I guess you don't take the easy way out do you ...
The electric solenoid could easily be replaced with a pin that is installed manually. That is how I would test the unit. The problem there is that it is all under the front shield. There may be access from the oil door, but not having to crawl under the truck has its advantages , as does flipping the switch to engage / disengage periodically during an offroad adventure.

"Speed doesn't kill, suddenly becoming stationary does." - Richard Hammond
"Speed is just a matter of Money - How fast do YOU want to go?"-Mechanic from Mad Max-
If at first you don't succeed - Don't take up Skydiving!
- ThunderII KE7CSK
User avatar
killian96ss
Crew K Elite
Crew K Elite
Posts: 2669
Joined: Tue Sep 09, 2003 11:53 am
Location: Sacramento, California

Post by killian96ss »

HenryJ wrote:
killian96ss wrote:...I find it interesting that Dodge decided to mount the disconnect system off to one side. :? I would think this would cause different spring rates for each side since the drivers side has a longer section of bar which would enable it to twist more than the passenger side when in the locked position. My guess is that they had to mount it there for interference problems.
The disconnect can be at any point and not affect the spring rate. The disconnect point is not a fixed point for the bar.
The bar is twisted from each end and is only one spring , not two.
The break point in the bar does not twist any longer, so one side of the bar has more material to "twist" vs. the short end of the bar which has less material to "twist". As soon as you cut the bar in any place you now have 2 bars. If each bar was an equal length, then yes what you are describing is true. I have an example that might make sense. Imagine a straight spring steel bar similar to a torsion bar. When you twist the bar the load is being spread through the entire bar in an equal amount due to grain structure and the fact that the bar is one piece. Now, cut the bar right in the middle and attach a permanent fixed point that does not flex and do the same twist test. Each side of the bar will twist the same amount since the material is equal on both sides. Next, try cutting the bar so that 1/3 of it is attached to the permanent fixed point that still doesn't flex and the other 2/3 to the other side and repeat the twist test. I guarantee the longer bar will have more capability to flex since it is longer and has more grain structure to spread the load while the short side will be extremely stiff since it has nowhere to spread the load. The problem here is the fixed point that does not flex. I know what your saying about the disconnect point of the bar not being a fixed point, and that the bar is still only technically 1 bar with 1 spring rate, however the spring rate and stress applied to each side of the bar will be different no matter how you look at it. :wink:

Steve
User avatar
HenryJ
Admin K Elite
Admin K Elite
Posts: 12705
Joined: Tue Oct 01, 2002 9:14 pm
Location: Ontario, Oregon
Contact:

Post by HenryJ »

killian96ss wrote:...The break point in the bar does not twist any longer
True. This affects the overall spring rate.
... so one side of the bar has more material to "twist" vs. the short end of the bar which has less material to "twist"
Wrong. The links are the ends and there is one spring between them. It makes no difference if the "twist" or spring tension is more in one section of the twisted bar, than another. No bar is perfect anyway. The forces are still only applied to the ends equally.
As soon as you cut the bar in any place you now have 2 bars.
And when you reconnect them you have one.

"Speed doesn't kill, suddenly becoming stationary does." - Richard Hammond
"Speed is just a matter of Money - How fast do YOU want to go?"-Mechanic from Mad Max-
If at first you don't succeed - Don't take up Skydiving!
- ThunderII KE7CSK
User avatar
killian96ss
Crew K Elite
Crew K Elite
Posts: 2669
Joined: Tue Sep 09, 2003 11:53 am
Location: Sacramento, California

Post by killian96ss »

HenryJ wrote:
killian96ss wrote:... so one side of the bar has more material to "twist" vs. the short end of the bar which has less material to "twist"
Wrong. The links are the ends and there is one spring between them. It makes no difference if the "twist" or spring tension is more in one section of the twisted bar, than another.
:lol: This is simple physics. If you cut the bar you have 2 bars with 2 different spring rates, not 1 bar with 1 spring rate just because they are re-connected. The disconnect point does not twist or transmit energy from one side to the other. This is exactly why 2 different length bars will have 2 different spring rates. My explanation above is based on simple physics and the grain structure of the sway bar. Here is another example. Lets say you have 2 identical torsion bars. You install one on your truck as is, and the other one you cut in half. The one that you cut in half is re-attached to itself with a permanent mount that can not flex. Do you think both t-bars will still have the same spring rate? The answer is NO! The bar with the permanent fixed point will actually be stiffer than the other for 1 very simple reason. Grain structure. The single bar can transmit flex throughout the entire shaft due to the continuous grain structure of the steel. The bar with the break point can't do this as smoothly because there is a point in the bar that no longer flexes which causes each side of the bar to twist independently which increases the spring rate for each short bar. The Dodge for example will now have slightly higher resistance on the passenger side vs. the drivers side. It probably isn't noticeable to the driver, but it is definitely happening! As I stated earlier your explanation is true only if both sides of the bar are equal lengths. :wink:

Steve
User avatar
HenryJ
Admin K Elite
Admin K Elite
Posts: 12705
Joined: Tue Oct 01, 2002 9:14 pm
Location: Ontario, Oregon
Contact:

Post by HenryJ »

Think about it a little more. You are wrong. You are confusing the detachment point with an attachment point. the forces are transfered from one link to the other. No matter how hard you try there are only two points and one spring between them.
Equal lengths and differing spring rates only apply if there are four fixed points instead of two.
You have the right ideas, you're just a little confused.
Last edited by HenryJ on Fri Mar 31, 2006 3:58 pm, edited 1 time in total.

"Speed doesn't kill, suddenly becoming stationary does." - Richard Hammond
"Speed is just a matter of Money - How fast do YOU want to go?"-Mechanic from Mad Max-
If at first you don't succeed - Don't take up Skydiving!
- ThunderII KE7CSK
User avatar
killian96ss
Crew K Elite
Crew K Elite
Posts: 2669
Joined: Tue Sep 09, 2003 11:53 am
Location: Sacramento, California

Post by killian96ss »

HenryJ wrote:Think about it a little more. You are wrong. You are confusing the detachment point with an attachment point. the forces are transfered from one link to the other. No matter how hard you try there are ony two points and one spring between them.
Equal lengths and spring rates only apply if there are four fixed points instead of two.
You have the right ideas, you're just a little confused.
:angel: No confusion here and everything I posted is the truth! Once again this is simple physics! It is perfectly fine that we do not agree. :wink: I am sorry for getting so far off topic with this info. :( I think our energy would be better spent trying to find a way to develope a good sway bar disconnect. :D To be honest I like your disconnect idea better, however it will take a lot more planning to make it work right and work safely. If it can be done, I would bet there would be a market for it. :wink:

Steve
User avatar
HenryJ
Admin K Elite
Admin K Elite
Posts: 12705
Joined: Tue Oct 01, 2002 9:14 pm
Location: Ontario, Oregon
Contact:

Post by HenryJ »

killian96ss wrote:.... this is simple physics!
Agreed. No matter how hard you try you're not going to change it.
You'll figure it out eventually. Remember: K.I.S.S. - Keep It Simple Stupid. You are trying to make this way too complicated.

Force - transfer - force , The energy has to go somewhere it does not vanish.
Last edited by HenryJ on Fri Mar 31, 2006 2:25 pm, edited 2 times in total.

"Speed doesn't kill, suddenly becoming stationary does." - Richard Hammond
"Speed is just a matter of Money - How fast do YOU want to go?"-Mechanic from Mad Max-
If at first you don't succeed - Don't take up Skydiving!
- ThunderII KE7CSK
User avatar
killian96ss
Crew K Elite
Crew K Elite
Posts: 2669
Joined: Tue Sep 09, 2003 11:53 am
Location: Sacramento, California

Post by killian96ss »

Have you seen any late model S10 4x4's in the bone yards up there lately? It would be nice to have the same sway bar that we have to experiment with. :D I'll keep an eye open around here for one. :wink: One of my friends who is a machinist has offered to help me with anything I might need in designing a disconnect system, and we both agree it would be cool to prototype a center disconnect for the S10's. Strength is our main concern since the sway bar can be subjected to a lot of stress when cornering hard. I believe it can be done, but it has to be safe! I don't want to see anyone lose control of their vehicle due to a design flaw. :( It sure would be nice to see the internals of the Dodge or Jeep disconnect system for some ideas. :idea:

Steve
User avatar
HenryJ
Admin K Elite
Admin K Elite
Posts: 12705
Joined: Tue Oct 01, 2002 9:14 pm
Location: Ontario, Oregon
Contact:

Post by HenryJ »

There are quite a few in the boneyards here now. I haven't checked for the big bar like we have though.

I would guess that the Dodge disconnect may resemble our axle disconnect? Something like that would easily work, but require extensive modifications to build.

I'd still like some more details on Muslhed's method of stowing the disconnected bar.

I don't have the time to work on a disconnect right now, so unhooking and stowing will have to suffice for now.

"Speed doesn't kill, suddenly becoming stationary does." - Richard Hammond
"Speed is just a matter of Money - How fast do YOU want to go?"-Mechanic from Mad Max-
If at first you don't succeed - Don't take up Skydiving!
- ThunderII KE7CSK
User avatar
killian96ss
Crew K Elite
Crew K Elite
Posts: 2669
Joined: Tue Sep 09, 2003 11:53 am
Location: Sacramento, California

Post by killian96ss »

HenryJ wrote:I would guess that the Dodge disconnect may resemble our axle disconnect? Something like that would easily work, but require extensive modifications to build.
I wonder how much that Dodge unit goes for at the dealer? I would like to see one up close to get some ideas for my own, or possibly adapt it to the CC. This is probably wishful thinking since they are likely very expensive. I too would like to see more of Muslhed's set up. There isn't any good pictures in that thread over at ZR2.com even though it says updated pics. :lol:

Steve
User avatar
HenryJ
Admin K Elite
Admin K Elite
Posts: 12705
Joined: Tue Oct 01, 2002 9:14 pm
Location: Ontario, Oregon
Contact:

Post by HenryJ »

I bet you could stop by your local dealer. Talk to the parts person and get a copy of the exploded view.

"Speed doesn't kill, suddenly becoming stationary does." - Richard Hammond
"Speed is just a matter of Money - How fast do YOU want to go?"-Mechanic from Mad Max-
If at first you don't succeed - Don't take up Skydiving!
- ThunderII KE7CSK
User avatar
Snoman002
Crew Elite
Crew Elite
Posts: 191
Joined: Sat Nov 26, 2005 2:13 pm
Location: Ohio

Post by Snoman002 »

HJ, I like your idea of a electric disconnect, in fact I was trying to think of something similar myself.

The only issue I see with your disco design is when connected the "connection point" is only on one side of the bar. That means that when the bar is placed under stress it will place a side load on the pipe that is slid over the two bars. It is similar to my idea of using a flange, the only difference is that a flange with three bolts (equal distane apart) would create a circle of connection around the center of the bar, thus as it is stressed no side forces develope.


Also, HJ you say the trucks flex better in the rear than the blazers, but do they flex better than blazers without rear sway bars?
[size=75][b]1991 GMC Sonoma Extended Cb[/b] - 4.3L Automatic, 2" BL, 31" BFG's.
[b]1992 Chevy T-10 Reg Cab[/b] - 4.3L 5spd, 3" Bl, 31" Mud Tires. Hooker long tube headers and true duals.
[b]1999 Oldsmobile Bravada[/b] - Wifes truck, all stock.[/size]
User avatar
Snoman002
Crew Elite
Crew Elite
Posts: 191
Joined: Sat Nov 26, 2005 2:13 pm
Location: Ohio

Post by Snoman002 »

Oh, somebody mentioned the axle dosconnect. I have been thinking on how those components would work, they are fairly large and are hardened.

I might have to drag my extra diff out and take a look.
[size=75][b]1991 GMC Sonoma Extended Cb[/b] - 4.3L Automatic, 2" BL, 31" BFG's.
[b]1992 Chevy T-10 Reg Cab[/b] - 4.3L 5spd, 3" Bl, 31" Mud Tires. Hooker long tube headers and true duals.
[b]1999 Oldsmobile Bravada[/b] - Wifes truck, all stock.[/size]
User avatar
HenryJ
Admin K Elite
Admin K Elite
Posts: 12705
Joined: Tue Oct 01, 2002 9:14 pm
Location: Ontario, Oregon
Contact:

Post by HenryJ »

Snoman002 wrote:...you say the trucks flex better in the rear than the blazers, but do they flex better than blazers without rear sway bars?
I don't say that.
HenryJ wrote:... The rear of our trucks articulates great. Look at the shots Hobie and Justin have done , as well as some of mine. The rear of these trucks really rock...literally. The front suspension is our limiting factor.
There are way too many factors to consider. For one there are several different spring packages available. There is the difference in wheelbase. I do not know if the springs are even the same length. With and without sway bar. What size sway bar? Two door or four door? Crew cab, excab or standard cab? How is it loaded? The list goes on and on.
I can not say which has the best articulation.
There are some factors that can be reasoned. Which will ramp higher numbers a short wheel base or longer wheel base?
Does a sway bar affect articulation? Which suspension allows for more wheel travel?

My truck is pretty well balanced. Expedition loaded the front and rear axles weight out the same.

"Speed doesn't kill, suddenly becoming stationary does." - Richard Hammond
"Speed is just a matter of Money - How fast do YOU want to go?"-Mechanic from Mad Max-
If at first you don't succeed - Don't take up Skydiving!
- ThunderII KE7CSK
User avatar
killian96ss
Crew K Elite
Crew K Elite
Posts: 2669
Joined: Tue Sep 09, 2003 11:53 am
Location: Sacramento, California

Post by killian96ss »

Finally some good pictures of Muslhed's sway bar disconnects. :D

Muslhed's ZR2 Pictures

Image

Image

Steve
User avatar
Miles
Crew
Crew
Posts: 80
Joined: Sun Oct 23, 2005 6:31 pm
Location: Joshua, TX.
Contact:

Post by Miles »

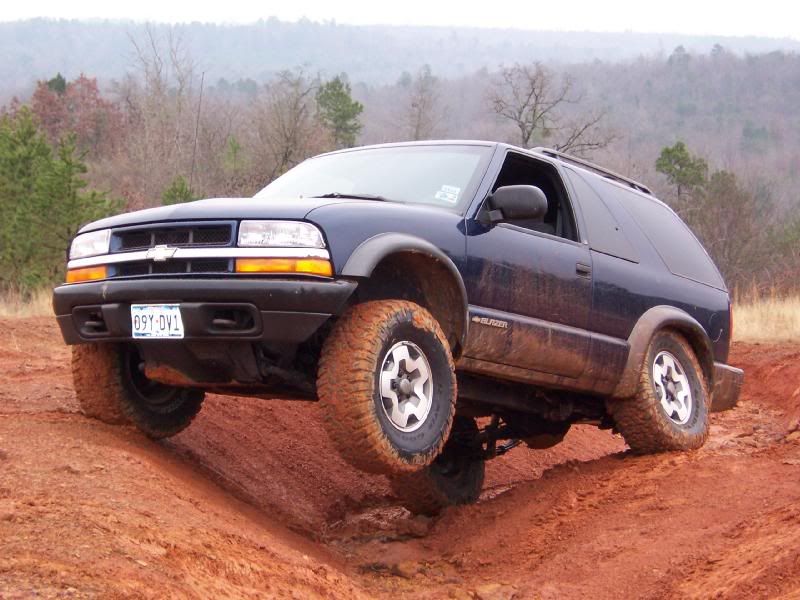
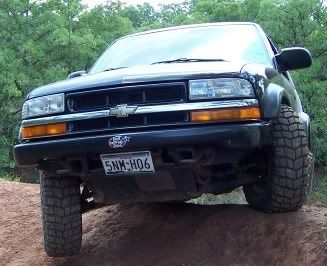
Wow! There seems to be a HUGE splurge of interest in this, on just about every S-10 board right now. Hmmmm... The whole purpose of this project, was to design something simple, that does not require the use of any tools to disconnect or reconnect.

As for parts, I used a 5" Grade 8, 3/8ths bolt, on each side. I had a small tab welded to the head of the bolt, to keep the bolt stationary, when I unscrewed the wingnuts on the bottom with my fingers....hence the use of NO tools! I also had a small hole drilled through the bottom of the bolt, so that I could put in a locking pin to keep the wingnut from backing off. I also used an Energy Suspension Polyurethane Bushing front sway bar kit, because the factory rubber ones were kinda mushed! I also glued the polyurethane bushings to the bushing washers, and tack welded the middle bushing washers to the small sleeve that was supplied in the Energy Suspension kit. Now the entire assembly comes apart in 3 separate pieces....rather than 8 separate pieces. The last thing I did was smooth or debur the 5" Grade 8 bolts, so that they would move freely through the center sleeve. It takes me about 3 minutes total to disco it, and swing it forward behind the bumper. I did have to remove the front plastic valance that normally hangs behind the bumper, but then again.....it needed to go anyway (one less thing to get in the way)! I also drilled a hole in the driver side outer bumper bracket, and attached a small Clevis to it, and then attached a larger clevis to the smaller clevis, that had the same I.D. as the O.D. of the sway bar. I got these from Tractor Supply. The Energy Suspension Poly Bushing kit definitely gave it a much stiffer & more responsive on-road driving experience!

Here's the pics: Click

Having explained how to build them, let me touch on one other area that I seem to have the hardest time trying to explain. It is in regards to front to rear weight balance. In My Opinion, I feel that any vehicle that has a very good front to rear weight ratio, will be much better suited to navigate twisty/off-camber terrain off-road. Here goes:

S-10 Blazers are fairly well balanced in terms of their front to rear weight ratio. This simple aspect helps in a number of areas off-road. This simple aspect is also the biggest contributor toward getting the most out of disconnecting the sway bars on a Blazer.

S-10 Regular Cab & X-cabs are very front heavy, but very light in the rear end. If one were to disco their front sway bar on either of these trucks, they WOULD NOT see that much of a difference, because of the very front biased weight ratio. Why? Because there is simply not enough weight in the rearend to compress the opposing TB in the front!

Crew Cab S-10's will have better front to rear ratio than a standard cab or X-cab, but still are not as balanced as a Blazer, in stock form. By discoing the front sway bar on a CC, you will see better result than a X-cab.

To get the most potential out of your suspension on your truck, be it a Reg Cab, X-cab or even a Crew Cab.......there needs to be some creative distribution of weight in the bed of your truck, to help balance out the weight front to rear. This is important not only for the sake of getting the stock S-10 suspension to function better, but to also perform better off-road. This can be done by creatively positioning all of your gear (tools, recovery gear, spare tire, Hi-Lift jack, axe, shovel, spare parts, etc.) toward the rear of your tailgate, and securing it there. This will change your front to rear weight ratio in a very positive way, and furthermore, affects the weight transfer of the vehicle, while negotiating through twisty, off-camber terrain.

To be honest guys, I have literally explained my heart out regarding this modification in a few other threads, and I am really struggling with why this whole weight distribution topic is so hard to make others understand! I enjoy modifying my Blazer to get the most out if it in stock form, and I also enjoy sharing what works & what doesn't, to other S-10 enthusiasts like me......regardless of what style S-10 it is (ZR2, Pickup, X-cab, C-cab, 4-door Blazer, etc.). If you want a very cheap, yet effective & simple way to disconnect the front sway bar on your 2nd Gen S-series, here ya go! It has worked flawlessly for me.

Here are the threads that I have discussed this mod in. Please take some time to read through them, as there is ALOT of very good information in there.

Original thread on ZR2.com, from Jan. 2005 through today

Recent thread on ZR2USA.com

Another recent thread on ZR2.com, that has me a lil frustrated

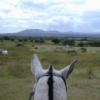
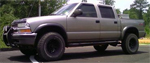
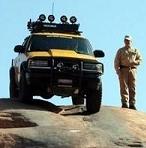
Lastly, here is my RTI album for you to view. In the first three pics, you will see a bone stock X-cab, bone stock Blazer and my disco'd Blazer on the same 30* RTI ramp.

Enjoy!
Last edited by Miles on Sat Apr 01, 2006 4:05 pm, edited 4 times in total.
[size=75][b][color=orange][i]~Jeremy[/i][/color][/b]

[i][b][color=blue]'00 ZR2 Blazer, 33" KM2's on PA3's, Lock Right in Iron front diff/Detroit Locker in rear, sway-bar disco's, 1-Ton P & I Arms[/color][/b][/i]

[b][color=yellow]BlaZeR pics [/color][/b][url=http://photobucket.com/albums/b240/Muslhed/Best%20Blazer%20pics/][b][color=red]HERE[/color][/b][/url][/size]
User avatar
killian96ss
Crew K Elite
Crew K Elite
Posts: 2669
Joined: Tue Sep 09, 2003 11:53 am
Location: Sacramento, California

Post by killian96ss »

Jeremy, thanks for all the info on your SB disco set up! :thumb:

Steve
User avatar
HenryJ
Admin K Elite
Admin K Elite
Posts: 12705
Joined: Tue Oct 01, 2002 9:14 pm
Location: Ontario, Oregon
Contact:

Post by HenryJ »

Jeremy :bow: Thanks so much for taking the time to bring all that to us!

"Speed doesn't kill, suddenly becoming stationary does." - Richard Hammond
"Speed is just a matter of Money - How fast do YOU want to go?"-Mechanic from Mad Max-
If at first you don't succeed - Don't take up Skydiving!
- ThunderII KE7CSK
User avatar
Miles
Crew
Crew
Posts: 80
Joined: Sun Oct 23, 2005 6:31 pm
Location: Joshua, TX.
Contact:

Post by Miles »

No problem guys! Let me know how yours turn out. BTW, I edited some of my build instructions, in my post above, to better clarify a few important points.
[size=75][b][color=orange][i]~Jeremy[/i][/color][/b]

[i][b][color=blue]'00 ZR2 Blazer, 33" KM2's on PA3's, Lock Right in Iron front diff/Detroit Locker in rear, sway-bar disco's, 1-Ton P & I Arms[/color][/b][/i]

[b][color=yellow]BlaZeR pics [/color][/b][url=http://photobucket.com/albums/b240/Muslhed/Best%20Blazer%20pics/][b][color=red]HERE[/color][/b][/url][/size]
User avatar
Blaze One
Crew Elite
Crew Elite
Posts: 410
Joined: Thu Jul 14, 2005 5:05 pm
Location: BC Canada

Post by Blaze One »

yes thank you .

After lookin at all the comparison pics and comparison pics with other makes of truck , i can clearly see it is worth the time to do this mod .
Especially when you compare the amount of travel up the ramp of a Disco'd ZR2 to the Excursion/Jeeps . It will sure shut those Jeep guys and there SFA . ( although ultimatley SFA is going to win ) .
[size=75]1995 Chevy Blazer 2dr 4x4 Limited Edition [/size]
User avatar
HenryJ
Admin K Elite
Admin K Elite
Posts: 12705
Joined: Tue Oct 01, 2002 9:14 pm
Location: Ontario, Oregon
Contact:

Post by HenryJ »

With a bodylift I do not want to remove the front valance. It serves to stow my landlines for cab heater and engine block, as well has a set of driving lights and hiding what would be an exposed frame.

A center disconnect would require a revamp/remodel of the front shield, or more likely a new shield. I am not ready to do that right now.

I will likely follow Jeremy's lead for the disconnects.

The crew cab's mounts are a little different, and the bar may swing forward to a slightly different position as well. I can see where the greasable poly mounts would be an advantage here. Not only would they facilitate easier swinging to the forward position, but the endlinks poly bushings resistance would require less torque on reassembly for adequate performance. This would be an advantage for "tool-free" assembly.

"Speed doesn't kill, suddenly becoming stationary does." - Richard Hammond
"Speed is just a matter of Money - How fast do YOU want to go?"-Mechanic from Mad Max-
If at first you don't succeed - Don't take up Skydiving!
- ThunderII KE7CSK
User avatar
HenryJ
Admin K Elite
Admin K Elite
Posts: 12705
Joined: Tue Oct 01, 2002 9:14 pm
Location: Ontario, Oregon
Contact:

Post by HenryJ »

I made the first step toward a disconnect today. I installed the polyurethane bushing kit.
As you may know the stock bushings that hold the sway bar to the frame, are rubber. Trying to swing a disconnected bar forward on those rubber mounts is difficult. That is why installing the greaseable poly mounts is an advantage. The bar moves much easier.
While doing this I calculated the differences.
This may be a little difficult to grasp through text, but here goes.
The sway bar reduces body roll. As one wheel travels upward the bar twists and trys to pull the opposite side upward as well. When you go into a corner the idea is that the whole front squats rather than roll to the outside. For offroading this means when you twist through an off camber section. The front body wants to try to follow the terrain , or tip , rather than remaining level allowing the suspension to travel independently.
By disconnecting the sway bar we are attempting to keep the vehicle level while the wheels traverse the terrain.

Here is what I did.
I used a ramp. I pulled my left front tire up on the ramp and took measurements at all four fenders. This was done stock. Then with the sway bar disconnected and with polyurethane bushings installed. The difference from side to side was subtracted, then the difference was added to the rear. The percentages were calculated from there. The percentages did closely mirror the front alone. I wanted to add the rear measurements to allow for some frame twist. It didn't amount to much since the front alone was virtually the same percentages.

If we call disconnected our baseline the stock bushings decreased body roll by 6%. Poly bushings decreased body roll by 23%.

What does this mean? Well, having the sway bar disconnected and running the stock bushings , the body is tipped 6% less than with the bar attached. Once I added the poly bushings this percentage really increases and the body will tip with the frontend 23% more than it would with the bar disconnected. The bar being disconnected then makes a big difference.

I have not yet drilled the bolts for pins, or added wing nuts. If there is time I will do that as well as fab a mount for the disconnected bar.
Those who added the first gen tow hooks may already know this, but it looks like they will make a very nice attachment point for the sway bar when in the forward position :thumb:
Last edited by HenryJ on Sat Apr 15, 2006 2:18 pm, edited 1 time in total.

"Speed doesn't kill, suddenly becoming stationary does." - Richard Hammond
"Speed is just a matter of Money - How fast do YOU want to go?"-Mechanic from Mad Max-
If at first you don't succeed - Don't take up Skydiving!
- ThunderII KE7CSK
User avatar
killian96ss
Crew K Elite
Crew K Elite
Posts: 2669
Joined: Tue Sep 09, 2003 11:53 am
Location: Sacramento, California

Post by killian96ss »

Excellent info! :thumb: That's a pretty big difference in reduced body roll going from 6% to 23%. :o I love the way my CC handles now compared to stock. 8)

Steve
User avatar
HenryJ
Admin K Elite
Admin K Elite
Posts: 12705
Joined: Tue Oct 01, 2002 9:14 pm
Location: Ontario, Oregon
Contact:

Post by HenryJ »

Keep in mind that those figures are kind of rough. The stock endlinks could probably been a little tighter and I am sure that a bigger ramp may have provided better results.
The performance is not likely to be straight line. More likely a curve.
The sway bar disconnect is a "must do" now as the poly parts have really cut down the travel.

"Speed doesn't kill, suddenly becoming stationary does." - Richard Hammond
"Speed is just a matter of Money - How fast do YOU want to go?"-Mechanic from Mad Max-
If at first you don't succeed - Don't take up Skydiving!
- ThunderII KE7CSK
User avatar
HenryJ
Admin K Elite
Admin K Elite
Posts: 12705
Joined: Tue Oct 01, 2002 9:14 pm
Location: Ontario, Oregon
Contact:

Post by HenryJ »

UPDATE:
I finally took the time to get this working. I used two 3/8" grade eight bolts that were 4 1/2" long. I welded tabs across the heads with the intent to follow Muslhed's plan. This changed a little during the install.

The wing nut and pin thing works pretty well. The tab to hold the bolt head while tightening the wing nut is where I strayed. I wanted the wing nut and pin to be up. That way they do not take the abuse from brush and debris quite as bad. This is where I found that the tabs needed to be a little more finger friendly, so I twisted the ends.

Image

I still need to repaint them after the "adjustment". I can get them pretty tight by holding the wing nut and twisting the bottom end. The longer tabs offer a little more leverage. Here they are installed-

Image

For holding the sway bar up while disconnected. Those first gen tow hooks work great! The bar swings up just clearing them. All that was needed is to slip a cap over the tips and the sway bar can not swing down! I slipped a couple 1" long pieces of heater hose over the ends as a trial-

Image

With both of them on there the bar will not pass. I stopped by the hardware store this evening and picked up a nice pair of 7/8" black rubber end caps. They look something like a furniture foot cap or crutch end cap. They do look much better. I'll probably throw the heater hose pieces in the tool box just in case.

I haven't been out testing it yet, but so far it sure looks like it should be a nice addition.

Thanks for all the ideas! :thumb:
Last edited by HenryJ on Fri Jan 05, 2007 7:43 pm, edited 2 times in total.

"Speed doesn't kill, suddenly becoming stationary does." - Richard Hammond
"Speed is just a matter of Money - How fast do YOU want to go?"-Mechanic from Mad Max-
If at first you don't succeed - Don't take up Skydiving!
- ThunderII KE7CSK
User avatar
Blaze One
Crew Elite
Crew Elite
Posts: 410
Joined: Thu Jul 14, 2005 5:05 pm
Location: BC Canada

Post by Blaze One »

I hope Muslhed dosen't mind , but I edited a couple pics of the Blazers on the 30* RTI ramp.
The blue blazer has the sway bar disco'd and rear bar removed . THis pic may give a better visual of the gained travel .

http://www3.telus.net/public/a6a60430/2 ... Blazer.jpg

http://www3.telus.net/public/a6a60430/3 ... Blazer.jpg

I don't know how to resize so i couldn't do a side by side :oops:
[size=75]1995 Chevy Blazer 2dr 4x4 Limited Edition [/size]
User avatar
Miles
Crew
Crew
Posts: 80
Joined: Sun Oct 23, 2005 6:31 pm
Location: Joshua, TX.
Contact:

Post by Miles »

:shock: That's pretty cool! On a 30* ramp, that's quite a bit of difference. No, I don't mind at all! I'm sticking them in my album btw! 8)
[size=75][b][color=orange][i]~Jeremy[/i][/color][/b]

[i][b][color=blue]'00 ZR2 Blazer, 33" KM2's on PA3's, Lock Right in Iron front diff/Detroit Locker in rear, sway-bar disco's, 1-Ton P & I Arms[/color][/b][/i]

[b][color=yellow]BlaZeR pics [/color][/b][url=http://photobucket.com/albums/b240/Muslhed/Best%20Blazer%20pics/][b][color=red]HERE[/color][/b][/url][/size]
User avatar
Blaze One
Crew Elite
Crew Elite
Posts: 410
Joined: Thu Jul 14, 2005 5:05 pm
Location: BC Canada

Post by Blaze One »

lol , no problem . glad you can make use of them .
[size=75]1995 Chevy Blazer 2dr 4x4 Limited Edition [/size]
User avatar
HenryJ
Admin K Elite
Admin K Elite
Posts: 12705
Joined: Tue Oct 01, 2002 9:14 pm
Location: Ontario, Oregon
Contact:

Post by HenryJ »

I had the chance to try out the disconnected sway bar. The flip forward and capped hooks storage worked great. Easy and simple. The truck did feel a little "mushy" on the highway, but nothing scary. Offroad it floated nicely over the terrain. It definitely allows the suspension to move more than it would have connected. I actually rubbed a front tire on the inner fender. I was going a little fast over a hard twist and just bumped. This was a first since the cut-outs. I may have had the wheel turned slightly when it rubbed? I am sure this was due to the front sway bar being disconnected.
Installation and removal was easy. I just tossed a small tarp on the ground to slide under and in minutes the job was complete. Those big tabs I welded on the bolts are definitely needed. I would hate to try and tighten the wing nuts without them.

A very good mod. This one I would do again, Thanks!
Last edited by HenryJ on Fri Nov 10, 2006 1:24 pm, edited 1 time in total.

"Speed doesn't kill, suddenly becoming stationary does." - Richard Hammond
"Speed is just a matter of Money - How fast do YOU want to go?"-Mechanic from Mad Max-
If at first you don't succeed - Don't take up Skydiving!
- ThunderII KE7CSK
User avatar
Miles
Crew
Crew
Posts: 80
Joined: Sun Oct 23, 2005 6:31 pm
Location: Joshua, TX.
Contact:

Post by Miles »

What's really wierd is going wheeling with them connected.....after having wheeled without them, for a good while! I did it today, and it was amost a night vs. day difference. No "floating" or following of the terrain, and I was lifting tires everywhere. Pretty crazy.....
[size=75][b][color=orange][i]~Jeremy[/i][/color][/b]

[i][b][color=blue]'00 ZR2 Blazer, 33" KM2's on PA3's, Lock Right in Iron front diff/Detroit Locker in rear, sway-bar disco's, 1-Ton P & I Arms[/color][/b][/i]

[b][color=yellow]BlaZeR pics [/color][/b][url=http://photobucket.com/albums/b240/Muslhed/Best%20Blazer%20pics/][b][color=red]HERE[/color][/b][/url][/size]
User avatar
F9K9
Mod K Elite
Mod K Elite
Posts: 6183
Joined: Sun May 30, 2004 12:26 pm
Location: London, Kentucky, United States

Post by F9K9 »

HenryJ wrote:.............For holding the sway bar up while disconnected. Those first gen tow hooks work great! The bar swings up just clearing them. All that was needed is to slip a cap over the tips and the sway bar can not swing down! I slipped a couple 1" long pieces of heater hose over the ends as a trial-

Image

With both of them on there the bar will not pass. I stoped by the hardware store this evening and picked up a nice pair of 7/8" black rubber end caps. They look something like a furniture foot cap or crutch end cap. They do look much better................
Brule, I'm starting to "prep" for the front sway bar "Discos" :D
Money is enroute to Jeremy so, I have some time. If, my luck (or lack there of :lol: ) holds true to form, I'll not find the 7/8" black rubber end caps. What size heater hose did you use? I remember that there use to be two sizes but, I can't remember what sizes they were.
[size=75][b]"For those who have fought for it, [i][color=red]FR[/color][color=white]EE[/color][color=blue]DOM[/color][/i] has a taste that the protected will never know."
[url=http://www.naxja.org/forum/showthread.php?t=73349]GUIDE TO SEARCHING. [i] (Some of the forum software is different but, it has helped me a lot.)[/i][/url][/b]
[b]"Those who don't know history are destined to repeat it." Edmund Burke[/b][/size]
User avatar
HenryJ
Admin K Elite
Admin K Elite
Posts: 12705
Joined: Tue Oct 01, 2002 9:14 pm
Location: Ontario, Oregon
Contact:

Post by HenryJ »

I bought them at my local TrueValue hardware store.

7/8" (22mm) Faultless , Rubber Leg Tips , #31931 , 4 pieces

Image

Available online here. $2.29

You can find them cheaper as singles if sold in bulk without packaging.

That failing a couple 1" long pieces of 3/4" heater hose will work.

"Speed doesn't kill, suddenly becoming stationary does." - Richard Hammond
"Speed is just a matter of Money - How fast do YOU want to go?"-Mechanic from Mad Max-
If at first you don't succeed - Don't take up Skydiving!
- ThunderII KE7CSK
User avatar
F9K9
Mod K Elite
Mod K Elite
Posts: 6183
Joined: Sun May 30, 2004 12:26 pm
Location: London, Kentucky, United States

Post by F9K9 »

Thank you :shock:
[size=75][b]"For those who have fought for it, [i][color=red]FR[/color][color=white]EE[/color][color=blue]DOM[/color][/i] has a taste that the protected will never know."
[url=http://www.naxja.org/forum/showthread.php?t=73349]GUIDE TO SEARCHING. [i] (Some of the forum software is different but, it has helped me a lot.)[/i][/url][/b]
[b]"Those who don't know history are destined to repeat it." Edmund Burke[/b][/size]
User avatar
HenryJ
Admin K Elite
Admin K Elite
Posts: 12705
Joined: Tue Oct 01, 2002 9:14 pm
Location: Ontario, Oregon
Contact:

Post by HenryJ »

You're welcome. Be prepared though....the box says "Made in China" :shock: ;)

"Speed doesn't kill, suddenly becoming stationary does." - Richard Hammond
"Speed is just a matter of Money - How fast do YOU want to go?"-Mechanic from Mad Max-
If at first you don't succeed - Don't take up Skydiving!
- ThunderII KE7CSK
User avatar
F9K9
Mod K Elite
Mod K Elite
Posts: 6183
Joined: Sun May 30, 2004 12:26 pm
Location: London, Kentucky, United States

Post by F9K9 »

Just because you know how to flip my switch doesn't mean that you have to go 80 miles out of your way to do it :bonk:
[size=75][b]"For those who have fought for it, [i][color=red]FR[/color][color=white]EE[/color][color=blue]DOM[/color][/i] has a taste that the protected will never know."
[url=http://www.naxja.org/forum/showthread.php?t=73349]GUIDE TO SEARCHING. [i] (Some of the forum software is different but, it has helped me a lot.)[/i][/url][/b]
[b]"Those who don't know history are destined to repeat it." Edmund Burke[/b][/size]
User avatar
F9K9
Mod K Elite
Mod K Elite
Posts: 6183
Joined: Sun May 30, 2004 12:26 pm
Location: London, Kentucky, United States

Post by F9K9 »

Got them put on with the snow flying. One thing I accidentally discovered for those that are worried about getting them on tight by hand is once they are put on when your rig on LEVEL ground is to park with one side higher than the other and tighten the high side. Reverse the slope to tighten the second side.

Image

I also used antisieze on the bolts because I had a tough time getting the stuff off of the original bolts.
[size=75][b]"For those who have fought for it, [i][color=red]FR[/color][color=white]EE[/color][color=blue]DOM[/color][/i] has a taste that the protected will never know."
[url=http://www.naxja.org/forum/showthread.php?t=73349]GUIDE TO SEARCHING. [i] (Some of the forum software is different but, it has helped me a lot.)[/i][/url][/b]
[b]"Those who don't know history are destined to repeat it." Edmund Burke[/b][/size]