Cracked Upper control arm bushings Update!
Moderator: F9K9


Cracked Upper control arm bushings Update!
My control arm bushings are cracked/dry rotted. Are they worth replacing? Will these affect performance? I can get pics if needed.
Last edited by Tony on Tue May 22, 2007 8:30 pm, edited 1 time in total.


In line with this questioning how hard are they to replace and what's it entail to do it?
[size=75][url=http://www.zr2usa.com/members.php?id=974]"Maxine"[/url]- K&N FIPK, Gibson Cat-Back, Knaffle Shackles and Receivers, Optima Red Top, Knaffle Sliders, etc.
I break at least 2 Federal Laws per day.[/size]
I break at least 2 Federal Laws per day.[/size]

They should be a pretty easy replacement. Remove the two bolts holding the control arm to the frame. Remove the upper balljoint. Then you can pull out the arm (might have to remove clips holding ABS sensor, and brake line from the arm as well. I've found when doing coilover conversions, the best way to get the old ones out with with fire. Be sure to do this outside, and have a fire extinguisher handy. Burn those old ones out of there, and be sure to keep the inner metal sleeves. You can use a large vice to press the new ones in. Then re-assemble, and take it to the alignment shop. Not terribly hard to do IMO.
And to answer your question directly.....yes they are worth replacing. I'd go so far as to say to replace that balljoint while your there, as well as the lower control arm bushings, and lower balljoint as well.
And to answer your question directly.....yes they are worth replacing. I'd go so far as to say to replace that balljoint while your there, as well as the lower control arm bushings, and lower balljoint as well.
[size=75][url=http://picasaweb.google.com/2kwik4u]2kwik4u's pics[/url][/size]
-
doughboy5499

- Crew Elite

- Posts: 131
- Joined: Mon Nov 07, 2005 5:59 am
- Location: Defiance, Ohio
Another hint when trying to get the sleave back in. Soak the rubber in some kind of oil for a while. this causes the rubber to swell up and loose. making it easier to get the sleeve in. I used to work at Tenneco Automotive/Clevite Elastomers and had to assemble and make stuff like this. does'nt work well with dry rubbers.2kwik4u wrote: be sure to keep the inner metal sleeves. You can use a large vice to press the new ones in.
We made all kinds of bushings for trak bars, tie-rods, swaybars, anything automotive that needs a bushing. Had to make the inner sleaves, mold the rubbers, weld eyes on the ends for the rubbers, and assemble all of them. Cool job.
[size=75]SOLD 2001 Red Sonoma CC Billet grille, nerf bars, Tek-Style tonneau, Silverstars, air box mod, K&N, Pioneer DEH P7700MP, Ventvisors, weather-tech floor mats, Rancho RS5000, 15% window tint
FOR SALE 2001 black Ford F-150 xlt 6" Fabtech susp. lift. 3" Body lift. MT wheels, Durango 315/75/16 tires, Pioneer DEH7700MP, Ventvisors, tint, hood scoop(bolt on), tool box, westin brush guard[/size]
FOR SALE 2001 black Ford F-150 xlt 6" Fabtech susp. lift. 3" Body lift. MT wheels, Durango 315/75/16 tires, Pioneer DEH7700MP, Ventvisors, tint, hood scoop(bolt on), tool box, westin brush guard[/size]
-
HenryJ

- Admin K Elite

- Posts: 12705
- Joined: Tue Oct 01, 2002 9:14 pm
- Location: Ontario, Oregon
- Contact:
OK, I disagree with a couple things. Feel free to bash me , I can take it.
#1 - Don't use fire.
The arms are lighter weight metal and the heat will alter the temper. You will end up with cracking in the future.
#2 - The sleeves are a part of the bushing , not the a-arm. Don't save them or worry about saving them.
You really need a press to do these right. I use an Arbor press. There are also big "c-clamp" type presses and "cup - rod - cone" type tools for doing this. A large vise and the appropriate size pipes or sockets could possibly be used, although it will be difficult.
I plan to replace mine with Polyurethane suspension bushings.
#1 - Don't use fire.
The arms are lighter weight metal and the heat will alter the temper. You will end up with cracking in the future.
#2 - The sleeves are a part of the bushing , not the a-arm. Don't save them or worry about saving them.
#3 - Don't soak rubber bushings in oil to install them. After removal make sure the oil is cleaned up. It will make mush of the rubber as described above.Energy Suspension wrote:HYPER-FLEX™ performance polyurethane control arm bushings do not rot or deteriorate from oils or atmospheric conditions such as ozone, smog, road salt, chemicals, and other corrosives. They will not deteriorate in a few short years and cause that mushy, uncertain steering response- like rubber O.E.M. ones often do. Most sets come with zinc plated outer metal shells.
You really need a press to do these right. I use an Arbor press. There are also big "c-clamp" type presses and "cup - rod - cone" type tools for doing this. A large vise and the appropriate size pipes or sockets could possibly be used, although it will be difficult.
I plan to replace mine with Polyurethane suspension bushings.
"Speed doesn't kill, suddenly becoming stationary does." - Richard Hammond
"Speed is just a matter of Money - How fast do YOU want to go?"-Mechanic from Mad Max-
If at first you don't succeed - Don't take up Skydiving! - ThunderII KE7CSK
Yea I've got the Energy Suspension ones in black already I just haven't done them yet so was wondering.
Looks like I might not be doing this myself, lol.
Wonder how much time/cost it will be to do them in a pro-shop?
Looks like I might not be doing this myself, lol.
Wonder how much time/cost it will be to do them in a pro-shop?
[size=75][url=http://www.zr2usa.com/members.php?id=974]"Maxine"[/url]- K&N FIPK, Gibson Cat-Back, Knaffle Shackles and Receivers, Optima Red Top, Knaffle Sliders, etc.
I break at least 2 Federal Laws per day.[/size]
I break at least 2 Federal Laws per day.[/size]
I replaced the ones in my wife's mail truck last thanksgiving. I used the graphite impregnated polyurethane bushings from energy suspension. The top bushings did not come with new sleeves.
I started out using my brother's press and wound up doing most of it with a big c-clamp and a set of 3/4" drive sockets for the right diameter to push.
It was time consuming and hard, but not difficult.
James
I started out using my brother's press and wound up doing most of it with a big c-clamp and a set of 3/4" drive sockets for the right diameter to push.
It was time consuming and hard, but not difficult.
James
Last edited by JaVeRo on Fri Apr 13, 2007 5:01 am, edited 1 time in total.
-
HenryJ
- Admin K Elite
- Posts: 12705
- Joined: Tue Oct 01, 2002 9:14 pm
- Location: Ontario, Oregon
- Contact:
That is good to know. What brand did you use?JaVeRo wrote:...I used the graphite impregnated polyurethane bushings. The top bushings did not come with new sleeves.
"Speed doesn't kill, suddenly becoming stationary does." - Richard Hammond
"Speed is just a matter of Money - How fast do YOU want to go?"-Mechanic from Mad Max-
If at first you don't succeed - Don't take up Skydiving! - ThunderII KE7CSK
It's right there in the post, Energy Suspension!
Sorry, I couldn't resist. I had edited my post to add the brand name and you must of quoted it before my edit was finished.
The part number is 3.3119G
The graphite is supposed to reduce the squeeking and it doesn't squeek.
I am real happy with the bushings. The handling is much better. Since my wife uses this truck on some really bad East Texas dirt roads, I am hoping they last longer than the rubber bushings.
James
2001 S10 Crew (wife's mail truck)
2002 S10 Crew, 2003 S10 Blazer
2006 K2500 5 speed
2002 S10 Crew, 2003 S10 Blazer
2006 K2500 5 speed
-
HenryJ
- Admin K Elite
- Posts: 12705
- Joined: Tue Oct 01, 2002 9:14 pm
- Location: Ontario, Oregon
- Contact:
Really good to know the uppers are not sleeved. I'll be looking elsewhere for bushings.
"Speed doesn't kill, suddenly becoming stationary does." - Richard Hammond
"Speed is just a matter of Money - How fast do YOU want to go?"-Mechanic from Mad Max-
If at first you don't succeed - Don't take up Skydiving! - ThunderII KE7CSK
-
killian96ss

- Crew K Elite

- Posts: 2669
- Joined: Tue Sep 09, 2003 11:53 am
- Location: Sacramento, California
-
HenryJ
- Admin K Elite
- Posts: 12705
- Joined: Tue Oct 01, 2002 9:14 pm
- Location: Ontario, Oregon
- Contact:
Prothane looks to have sleeved bushings.
All the 2wd stuff does as well. I'll do some more research as time permits.
For a street car there is really no issue. On an offroad vehicle dirt and abrasives could enter the space where it is not bonded and cause premature wear. I ran into this issue on Police cars during the refurb.
All the 2wd stuff does as well. I'll do some more research as time permits.
For a street car there is really no issue. On an offroad vehicle dirt and abrasives could enter the space where it is not bonded and cause premature wear. I ran into this issue on Police cars during the refurb.
"Speed doesn't kill, suddenly becoming stationary does." - Richard Hammond
"Speed is just a matter of Money - How fast do YOU want to go?"-Mechanic from Mad Max-
If at first you don't succeed - Don't take up Skydiving! - ThunderII KE7CSK
-
HenryJ
- Admin K Elite
- Posts: 12705
- Joined: Tue Oct 01, 2002 9:14 pm
- Location: Ontario, Oregon
- Contact:
Just got word back from Prothane.
I think I'll keep looking.
Squeeky upper bushings are not something I want to deal with. For my use stock rubber bushings might have an advantage over polyurethane in this application.
Not looking good for steel sleeved upper bushings, other than stock rubber ones.Prothane wrote:The lowers come with new outer metal shells and inner steels sleeves. The
uppers do not.
I think I'll keep looking.
Squeeky upper bushings are not something I want to deal with. For my use stock rubber bushings might have an advantage over polyurethane in this application.
"Speed doesn't kill, suddenly becoming stationary does." - Richard Hammond
"Speed is just a matter of Money - How fast do YOU want to go?"-Mechanic from Mad Max-
If at first you don't succeed - Don't take up Skydiving! - ThunderII KE7CSK
-
killian96ss
- Crew K Elite
- Posts: 2669
- Joined: Tue Sep 09, 2003 11:53 am
- Location: Sacramento, California
Brule, Moog makes a standard upper control arm bushing kit for our trucks part # K6283.HenryJ wrote:For my use stock rubber bushings might have an advantage over polyurethane in this application.
They also make a "problem solver" upper control arm bushing kit part # K6418 that they claim "provides additional handling benefits".
The problem solver bushings are usually made out of a higher durometer rubber, but not quite as hard as urethane.
Steve
-
HenryJ
- Admin K Elite
- Posts: 12705
- Joined: Tue Oct 01, 2002 9:14 pm
- Location: Ontario, Oregon
- Contact:
That sounds like a viable option, Thank you! 
"Speed doesn't kill, suddenly becoming stationary does." - Richard Hammond
"Speed is just a matter of Money - How fast do YOU want to go?"-Mechanic from Mad Max-
If at first you don't succeed - Don't take up Skydiving! - ThunderII KE7CSK
I think I'm going to get the Energy Suspension bushings. When I assemble then I'm going to use their Formula 5 Pre-lube to reduce squeaking.
Is there anything else I need to know before ordering/installing them?
Specifically not making them squeak? Should I add zerk fittings?
I'm going to pay a shop to press them in how much should I pay? I already got quoted $60.
Note-I'm bringing the bushings and control arms to them.
Is there anything else I need to know before ordering/installing them?
Specifically not making them squeak? Should I add zerk fittings?
I'm going to pay a shop to press them in how much should I pay? I already got quoted $60.
Note-I'm bringing the bushings and control arms to them.
[size=75]-Tony
[b]2001 GMC Sonoma Crew Cab SLS[/b] | 4.3L 262ci 90º V6; Hydra Matic 4L60E |
0 mods getting it back to factory shape then modding.[/size]
[b]2001 GMC Sonoma Crew Cab SLS[/b] | 4.3L 262ci 90º V6; Hydra Matic 4L60E |
0 mods getting it back to factory shape then modding.[/size]
I ended up using a C-clamp to install most of my bushings with a set of 3/4 drive sockets for the right size to push in the right spot. Considering the time it took me I would say $60 is very reasonable. It is something that a mechanic that does this often can do in half the time it takes a shade tree mechanic (me).
I wouldn't/didn't add grease fittings. I would be afraid of using the wrong grease and causing the bushings to deteriorate. I don't know that's even possible but it would be my luck.
James
I wouldn't/didn't add grease fittings. I would be afraid of using the wrong grease and causing the bushings to deteriorate. I don't know that's even possible but it would be my luck.
James
2001 S10 Crew (wife's mail truck)
2002 S10 Crew, 2003 S10 Blazer
2006 K2500 5 speed
2002 S10 Crew, 2003 S10 Blazer
2006 K2500 5 speed
-
killian96ss
- Crew K Elite
- Posts: 2669
- Joined: Tue Sep 09, 2003 11:53 am
- Location: Sacramento, California
Do not add zerk fittings.
The bushings do not have grease channels for this to work properly.
The Formula 5 Pre-Lube will work good enough.
Make sure you get the black bushings since they also have graphite added to them.
The other colored ones do not have the graphite.
$60 is reasonable if they are doing all of the bushings.
Are you doing the upper and lower control arms or just the uppers?
Steve
I will make sure to get the black ones. I will also be doing all the control arm bushings.killian96ss wrote:Do not add zerk fittings.
The bushings do not have grease channels for this to work properly.
The Formula 5 Pre-Lube will work good enough.
Make sure you get the black bushings since they also have graphite added to them.
The other colored ones do not have the graphite.
$60 is reasonable if they are doing all of the bushings.
Are you doing the upper and lower control arms or just the uppers?
Steve
The thing is $60 seems like alot for what could be done on a press in a few minutes.
[size=75]-Tony
[b]2001 GMC Sonoma Crew Cab SLS[/b] | 4.3L 262ci 90º V6; Hydra Matic 4L60E |
0 mods getting it back to factory shape then modding.[/size]
[b]2001 GMC Sonoma Crew Cab SLS[/b] | 4.3L 262ci 90º V6; Hydra Matic 4L60E |
0 mods getting it back to factory shape then modding.[/size]
-
F9K9

- Mod K Elite

- Posts: 6183
- Joined: Sun May 30, 2004 12:26 pm
- Location: London, Kentucky, United States
Hence......supply and demand. I am sure that the press was expensive. Paying for it and making a living is what is involved here. A couple hours of intense searching on the net may find a cheaper alternative but, what it boils down to is what you are willing to spend?Tony wrote:...............The thing is $60 seems like alot for what could be done on a press in a few minutes.
[size=75][b]"For those who have fought for it, [i][color=red]FR[/color][color=white]EE[/color][color=blue]DOM[/color][/i] has a taste that the protected will never know."
[url=http://www.naxja.org/forum/showthread.php?t=73349]GUIDE TO SEARCHING. [i] (Some of the forum software is different but, it has helped me a lot.)[/i][/url][/b]
[b]"Those who don't know history are destined to repeat it." Edmund Burke[/b][/size]
[url=http://www.naxja.org/forum/showthread.php?t=73349]GUIDE TO SEARCHING. [i] (Some of the forum software is different but, it has helped me a lot.)[/i][/url][/b]
[b]"Those who don't know history are destined to repeat it." Edmund Burke[/b][/size]
-
killian96ss
- Crew K Elite
- Posts: 2669
- Joined: Tue Sep 09, 2003 11:53 am
- Location: Sacramento, California
The tool itself will run you about $60 plus shipping, and I believe I paid about $50 a couple years back.f9k9 wrote:I am sure that the press was expensive. Paying for it and making a living is what is involved here.Tony wrote:...............The thing is $60 seems like alot for what could be done on a press in a few minutes.
If you plan on doing this again on another vehicle later it might be worth it to get the tool, but if this is a one time deal then just pay the $60 and let someone else do the work.
I have done 3 of my own vehicles plus a friends vehicle so the tool has easily paid for it self a few times.
Steve
-
F9K9
- Mod K Elite
- Posts: 6183
- Joined: Sun May 30, 2004 12:26 pm
- Location: London, Kentucky, United States
Nicely done, Steve
[size=75][b]"For those who have fought for it, [i][color=red]FR[/color][color=white]EE[/color][color=blue]DOM[/color][/i] has a taste that the protected will never know."
[url=http://www.naxja.org/forum/showthread.php?t=73349]GUIDE TO SEARCHING. [i] (Some of the forum software is different but, it has helped me a lot.)[/i][/url][/b]
[b]"Those who don't know history are destined to repeat it." Edmund Burke[/b][/size]
[url=http://www.naxja.org/forum/showthread.php?t=73349]GUIDE TO SEARCHING. [i] (Some of the forum software is different but, it has helped me a lot.)[/i][/url][/b]
[b]"Those who don't know history are destined to repeat it." Edmund Burke[/b][/size]
-
killian96ss
- Crew K Elite
- Posts: 2669
- Joined: Tue Sep 09, 2003 11:53 am
- Location: Sacramento, California
Is this for certain?killian96ss wrote:Any color will work, however the black ones have graphite added for better resistance to squeaking.Tony wrote:But get the black ones right?!
Steve
[size=75]-Tony
[b]2001 GMC Sonoma Crew Cab SLS[/b] | 4.3L 262ci 90º V6; Hydra Matic 4L60E |
0 mods getting it back to factory shape then modding.[/size]
[b]2001 GMC Sonoma Crew Cab SLS[/b] | 4.3L 262ci 90º V6; Hydra Matic 4L60E |
0 mods getting it back to factory shape then modding.[/size]
-
killian96ss
- Crew K Elite
- Posts: 2669
- Joined: Tue Sep 09, 2003 11:53 am
- Location: Sacramento, California
From Energy Suspension's web site:Tony wrote:Is this for certain?killian96ss wrote:Any color will work, however the black ones have graphite added for better resistance to squeaking.Tony wrote:But get the black ones right?!
Steve
What is the difference between the
Energy Suspension red and black polyurethane components?
Answer: Both are our Energy's HYPER-FLEX performance polyurethane formulations. Energy has impregnated selected black polyurethane components with graphite–to add a lubrication property. additionally, both Energy Suspension red and black polyurethane components are engineered differently than OEM rubber components–to be free a floating and non-binding design. This allows for the additional durometer (firmness) of the components, which adds to the performance improvement of the vehicle overall.
Steve
-
HenryJ
- Admin K Elite
- Posts: 12705
- Joined: Tue Oct 01, 2002 9:14 pm
- Location: Ontario, Oregon
- Contact:
Keep in mind that these will wear. Add dirt to the equation and they will wear faster. Things can get sloppy in a hurry for a vehicle that spends a bunch of time offroad.
With diligence and this understanding they can last a long time. Keep them clean.
The stock bushings flex and are adhered to the sleeves. This prevents the entrance of contaminants to any free spaces or voids. This may not be the case for the urethane bushings. Those that are not adhered to the sleeves allow a space where abrasives could enter.
Every modification has pros and cons. Knowledge is power.
"Speed doesn't kill, suddenly becoming stationary does." - Richard Hammond
"Speed is just a matter of Money - How fast do YOU want to go?"-Mechanic from Mad Max-
If at first you don't succeed - Don't take up Skydiving! - ThunderII KE7CSK
-
killian96ss
- Crew K Elite
- Posts: 2669
- Joined: Tue Sep 09, 2003 11:53 am
- Location: Sacramento, California
killian96ss wrote:I don't think the Henry J will respond to this reply, however Brule might.Tony wrote:Henry, what is the best way to keep them clean.
Steve
I'm lost?
[size=75]-Tony
[b]2001 GMC Sonoma Crew Cab SLS[/b] | 4.3L 262ci 90º V6; Hydra Matic 4L60E |
0 mods getting it back to factory shape then modding.[/size]
[b]2001 GMC Sonoma Crew Cab SLS[/b] | 4.3L 262ci 90º V6; Hydra Matic 4L60E |
0 mods getting it back to factory shape then modding.[/size]
-
killian96ss
- Crew K Elite
- Posts: 2669
- Joined: Tue Sep 09, 2003 11:53 am
- Location: Sacramento, California
-
HenryJ
- Admin K Elite
- Posts: 12705
- Joined: Tue Oct 01, 2002 9:14 pm
- Location: Ontario, Oregon
- Contact:
I'll answer to either
I would say hose them off.Pressure wash them from time to time if the opportunity presents itself. Just being aware that the debris needs to be removed and some care taken is half the battle.
I would say hose them off.Pressure wash them from time to time if the opportunity presents itself. Just being aware that the debris needs to be removed and some care taken is half the battle.
"Speed doesn't kill, suddenly becoming stationary does." - Richard Hammond
"Speed is just a matter of Money - How fast do YOU want to go?"-Mechanic from Mad Max-
If at first you don't succeed - Don't take up Skydiving! - ThunderII KE7CSK
Wouldn't water move some of the grease out of these possibly causing them to squeak even more? Also wouldn't getting water between the bushing and the sleeve pose corrosion problems?HenryJ wrote:I'll answer to either
I would say hose them off.Pressure wash them from time to time if the opportunity presents itself. Just being aware that the debris needs to be removed and some care taken is half the battle.
[size=75]-Tony
[b]2001 GMC Sonoma Crew Cab SLS[/b] | 4.3L 262ci 90º V6; Hydra Matic 4L60E |
0 mods getting it back to factory shape then modding.[/size]
[b]2001 GMC Sonoma Crew Cab SLS[/b] | 4.3L 262ci 90º V6; Hydra Matic 4L60E |
0 mods getting it back to factory shape then modding.[/size]
-
HenryJ
- Admin K Elite
- Posts: 12705
- Joined: Tue Oct 01, 2002 9:14 pm
- Location: Ontario, Oregon
- Contact:
They are not greasable. Any spray lubricant used during assembly will only serve to attract dust and retain the abrasive without a way of purging it by pumping in new.Tony wrote:Wouldn't water move some of the grease out of these possibly causing them to squeak even more?
It could if it stays in there long enough to cause oxidation of the metal (rust). The dirt is harder on the urethane than the water , would be my guess.Tony wrote:Also wouldn't getting water between the bushing and the sleeve pose corrosion problems?
"Speed doesn't kill, suddenly becoming stationary does." - Richard Hammond
"Speed is just a matter of Money - How fast do YOU want to go?"-Mechanic from Mad Max-
If at first you don't succeed - Don't take up Skydiving! - ThunderII KE7CSK
-
killian96ss
- Crew K Elite
- Posts: 2669
- Joined: Tue Sep 09, 2003 11:53 am
- Location: Sacramento, California
The answer to all these problems is the Formula 5 Pre-Lube.
Use a lot of this stuff during assembly.
Thoroughly coat all the bushing surfaces.
Formula 5 Pre-Lube is a very thick/heavy silicone grease that stays put under harsh conditions and high temps.
Yes, it will attract some dust on the surface, but the stuff is so thick that any dust/dirt will have a hard time migrating further into the bushing.
Don't use any other king of lube/grease with these bushings or the problems mentioned above could occur.
I have installed urethane bushings in several cars/trucks over the years and none of them ever had the bushings wear out due to dust, dirt or debris.
These bushings will most likely last longer than the vehicle.
Steve
-
HenryJ
- Admin K Elite
- Posts: 12705
- Joined: Tue Oct 01, 2002 9:14 pm
- Location: Ontario, Oregon
- Contact:
Maybe under "normal" easy use. For a vehicle that sees lots of offroad use and is treated like a rental they can get worn out faster than one would think. I tried them on a fleet truck once. That was a mistake.killian96ss wrote:...
These bushings will most likely last longer than the vehicle.
Police cars do not see as much dirt , but get abused sometimes. Tons of miles too. They will wear out at least one set in the life of the vehicle around here.
Your conditions and results may vary. Some areas have conditions that make matters worse. The red clay of Nevada can rot out steel in a wink. The volcanic sand of Central Oregon will polish like no other. The salts of Utah will oxidize stainless steel.
How you drive and the road conditions will play a part too.
For most people and with care they would likely last as long as most will keep a vehicle.
"Speed doesn't kill, suddenly becoming stationary does." - Richard Hammond
"Speed is just a matter of Money - How fast do YOU want to go?"-Mechanic from Mad Max-
If at first you don't succeed - Don't take up Skydiving! - ThunderII KE7CSK
I tore the front of the truck down with a buddy over the past couple of days.
The upper control arms are out. I should've made it more clear that I wanted to replace all the control arm bushings. I didn't realize for the lowers to be removed tension needs to be taken off of the torsion bars with GM's special tool. I don't think that is something I want to attempt.
Has anyone replaced the lower control arm bushings? A local shop wants $245 to do just the lowers. Is there any way I can do them myself without GM's tools?
My buddy who works for NAPA called around to a few shops for me. A known shop in the area says generally the uppers are the only ones to fail. Can anyone back this up? Visually my uppers look bad, while the lowers look good.
So I'm looking at just replacing the upper bushings for now with some NAPA OEM ones, and ordering the poly ones for the future. I'm kinda pressed for time.
What I'd like to do is get a used set of control arms get them powdercoated and then get the poly bushings installed. What do you guys think is reasonable for 4 stock control arms?
Thanks!
[size=75]-Tony
[b]2001 GMC Sonoma Crew Cab SLS[/b] | 4.3L 262ci 90º V6; Hydra Matic 4L60E |
0 mods getting it back to factory shape then modding.[/size]
[b]2001 GMC Sonoma Crew Cab SLS[/b] | 4.3L 262ci 90º V6; Hydra Matic 4L60E |
0 mods getting it back to factory shape then modding.[/size]
If you were closer I'd do the lowers for a case of beer, and someone standing around to hand me tools.
I've torn about quite a few 4wd s-series to install coilover kits. You don't need any special tools. Put the truck on stands. Unbolt the control arm. Use a prybar to get it to drop out of the frame pockets. Then the arm will pull off the torsion bar. If it's stuck, get a 5lb sledge, and smack it a few times. It'll come off. PB-Blast is your friend in that situation.
It's really not a huge ordeal, but will take a few hours time. 4hrs at $60/hr shop rate sounds about right to remove/replace the bushings.
[size=75][url=http://picasaweb.google.com/2kwik4u]2kwik4u's pics[/url][/size]
What about getting the lower control arm back on? Do you have to retension the torsion bar or anything?2kwik4u wrote:If you were closer I'd do the lowers for a case of beer, and someone standing around to hand me tools.
I've torn about quite a few 4wd s-series to install coilover kits. You don't need any special tools. Put the truck on stands. Unbolt the control arm. Use a prybar to get it to drop out of the frame pockets. Then the arm will pull off the torsion bar. If it's stuck, get a 5lb sledge, and smack it a few times. It'll come off. PB-Blast is your friend in that situation.
It's really not a huge ordeal, but will take a few hours time. 4hrs at $60/hr shop rate sounds about right to remove/replace the bushings.
Any other responses would be great!
[size=75]-Tony
[b]2001 GMC Sonoma Crew Cab SLS[/b] | 4.3L 262ci 90º V6; Hydra Matic 4L60E |
0 mods getting it back to factory shape then modding.[/size]
[b]2001 GMC Sonoma Crew Cab SLS[/b] | 4.3L 262ci 90º V6; Hydra Matic 4L60E |
0 mods getting it back to factory shape then modding.[/size]
I've not put one back on lately. It's been a few years. however the best I can recall we didn't use any special tools at all.
Put the control arm back on the torsion bar, then push/wedge/bang the control arm back into the pockets, reinstall the control arm bolts, then use a floor jack to rotate the arm up until it bolts into the spindle.
Put the control arm back on the torsion bar, then push/wedge/bang the control arm back into the pockets, reinstall the control arm bolts, then use a floor jack to rotate the arm up until it bolts into the spindle.
[size=75][url=http://picasaweb.google.com/2kwik4u]2kwik4u's pics[/url][/size]
-
HenryJ
- Admin K Elite
- Posts: 12705
- Joined: Tue Oct 01, 2002 9:14 pm
- Location: Ontario, Oregon
- Contact:
Rent, beg, borrow or buy the proper tools. It is easier and safer.
"Speed doesn't kill, suddenly becoming stationary does." - Richard Hammond
"Speed is just a matter of Money - How fast do YOU want to go?"-Mechanic from Mad Max-
If at first you don't succeed - Don't take up Skydiving! - ThunderII KE7CSK
HenryJ wrote:Rent, beg, borrow or buy the proper tools. It is easier and safer.
Have you removed the lower control arm? Do you know how difficult of a job this is?
[size=75]-Tony
[b]2001 GMC Sonoma Crew Cab SLS[/b] | 4.3L 262ci 90º V6; Hydra Matic 4L60E |
0 mods getting it back to factory shape then modding.[/size]
[b]2001 GMC Sonoma Crew Cab SLS[/b] | 4.3L 262ci 90º V6; Hydra Matic 4L60E |
0 mods getting it back to factory shape then modding.[/size]
-
HenryJ
- Admin K Elite
- Posts: 12705
- Joined: Tue Oct 01, 2002 9:14 pm
- Location: Ontario, Oregon
- Contact:
Not on my personal truck, but a few dozen othersTony wrote:Have you removed the lower control arm? Do you know how difficult of a job this is?
With the right tools it is not bad at all. Just don't get in a hurry. I have access to quite a few specialty tools for the job.
You can have a shop install them for about the cost of the tools needed to do the job yourself. You will still need a shop to align it afterward.
Would I do it myself? Sure. Without a torsion bar unloading tool, ball joint fork, torque wrench, axle socket and press for installing the bushings? No.
"Speed doesn't kill, suddenly becoming stationary does." - Richard Hammond
"Speed is just a matter of Money - How fast do YOU want to go?"-Mechanic from Mad Max-
If at first you don't succeed - Don't take up Skydiving! - ThunderII KE7CSK
-
killian96ss
- Crew K Elite
- Posts: 2669
- Joined: Tue Sep 09, 2003 11:53 am
- Location: Sacramento, California
Are your lower bushings cracked or damaged in any way? 
Usually the lower bushings are in much better shape, but it is always possible that one or more is in need of replacement.
If you do the lower bushings yourself make sure you get the correct tools as mentioned above so that it can be done safely and without damaging anything.
Some repairs can be done by bypassing certain steps, but when your talking about anything that is under pressure like coil springs, or torsion bars it is better to follow the correct procedure and use the right tools.
You will definitely appreciate having the right tools during reassembly more so than disassembly which is usually much easier.
When I did the upper bushings on my 88 S10 4x4 the lowers were still in great shape and didn't need to be replaced which surprised me for an almost 20 year old vehicle.
Steve
The lowers where in good shape. The only reason I want to replace them is I want to put poly on all the control arms. I think I'm just going to replace the uppers w/NAPA replacement ones then go to poly down the road.killian96ss wrote:Are your lower bushings cracked or damaged in any way?
Usually the lower bushings are in much better shape, but it is always possible that one or more is in need of replacement.
If you do the lower bushings yourself make sure you get the correct tools as mentioned above so that it can be done safely and without damaging anything.
Some repairs can be done by bypassing certain steps, but when your talking about anything that is under pressure like coil springs, or torsion bars it is better to follow the correct procedure and use the right tools.
You will definitely appreciate having the right tools during reassembly more so than disassembly which is usually much easier.
When I did the upper bushings on my 88 S10 4x4 the lowers were still in great shape and didn't need to be replaced which surprised me for an almost 20 year old vehicle.
Steve
[size=75]-Tony
[b]2001 GMC Sonoma Crew Cab SLS[/b] | 4.3L 262ci 90º V6; Hydra Matic 4L60E |
0 mods getting it back to factory shape then modding.[/size]
[b]2001 GMC Sonoma Crew Cab SLS[/b] | 4.3L 262ci 90º V6; Hydra Matic 4L60E |
0 mods getting it back to factory shape then modding.[/size]
-
HenryJ
- Admin K Elite
- Posts: 12705
- Joined: Tue Oct 01, 2002 9:14 pm
- Location: Ontario, Oregon
- Contact:
Could it be possible that they are twisted less due to the longer length of the arm? Maybe the torsion bar socket in the lower arm offers some reinforcement? Perhaps just the larger physical size of the bushings, or design?killian96ss wrote:...Usually the lower bushings are in much better shape...I did the upper bushings on my 88 S10 4x4 the lowers were still in great shape and didn't need to be replaced ...
I agree in just replacing the ones that need it if you are using OEM style parts. They will all be used parts soon
The upper a-arms would not be as likely to require the torsion bar tool, and you would not have to remove the axle nut. That makes them much easier to do.
"Speed doesn't kill, suddenly becoming stationary does." - Richard Hammond
"Speed is just a matter of Money - How fast do YOU want to go?"-Mechanic from Mad Max-
If at first you don't succeed - Don't take up Skydiving! - ThunderII KE7CSK
-
killian96ss
- Crew K Elite
- Posts: 2669
- Joined: Tue Sep 09, 2003 11:53 am
- Location: Sacramento, California
Sounds like you are doing the right thing here.Tony wrote:The lowers where in good shape. The only reason I want to replace them is I want to put poly on all the control arms. I think I'm just going to replace the uppers w/NAPA replacement ones then go to poly down the road.
It totally makes sense that you want poly bushings on the upper and lower control arms so that they are the same and will give better results if done together.
I still have the lower poly bushings for my 88 S10 sitting in my garage and wanted to do the same thing as you, but it wasn't needed at the time so I will put it off for a while until I really feel like tearing everything down again.
I already had enough fun that weekend replacing the upper bushings, all 4 ball joints, all 4 tie rods, pitman arm, idler arm, brake calipers, brake hoses, master cylinder, and sway bar bushings.
Steve
-
killian96ss
- Crew K Elite
- Posts: 2669
- Joined: Tue Sep 09, 2003 11:53 am
- Location: Sacramento, California
I would have to say it's probably the larger size of the bushings and less twisting as to why the lowers seem to last longer, however the REAL reason behind this might be completely different.HenryJ wrote:Could it be possible that they are twisted less due to the longer length of the arm? Maybe the torsion bar socket in the lower arm offers some reinforcement? Perhaps just the larger physical size of the bushings, or design?killian96ss wrote:...Usually the lower bushings are in much better shape...I did the upper bushings on my 88 S10 4x4 the lowers were still in great shape and didn't need to be replaced ...
Steve
Yeah, the lowers are much bigger.killian96ss wrote:I would have to say it's probably the larger size of the bushings and less twisting as to why the lowers seem to last longer, however the REAL reason behind this might be completely different.HenryJ wrote:Could it be possible that they are twisted less due to the longer length of the arm? Maybe the torsion bar socket in the lower arm offers some reinforcement? Perhaps just the larger physical size of the bushings, or design?killian96ss wrote:...Usually the lower bushings are in much better shape...I did the upper bushings on my 88 S10 4x4 the lowers were still in great shape and didn't need to be replaced ...
Steve
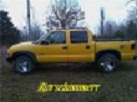
This is what my truck looks like right now.


[size=75]-Tony
[b]2001 GMC Sonoma Crew Cab SLS[/b] | 4.3L 262ci 90º V6; Hydra Matic 4L60E |
0 mods getting it back to factory shape then modding.[/size]
[b]2001 GMC Sonoma Crew Cab SLS[/b] | 4.3L 262ci 90º V6; Hydra Matic 4L60E |
0 mods getting it back to factory shape then modding.[/size]
-
F9K9
- Mod K Elite
- Posts: 6183
- Joined: Sun May 30, 2004 12:26 pm
- Location: London, Kentucky, United States
I think you are doing it right ! You get my "thumbs up" and hopefully I'll have a concrete work surface, like that, before much longer!
[size=75][b]"For those who have fought for it, [i][color=red]FR[/color][color=white]EE[/color][color=blue]DOM[/color][/i] has a taste that the protected will never know."
[url=http://www.naxja.org/forum/showthread.php?t=73349]GUIDE TO SEARCHING. [i] (Some of the forum software is different but, it has helped me a lot.)[/i][/url][/b]
[b]"Those who don't know history are destined to repeat it." Edmund Burke[/b][/size]
[url=http://www.naxja.org/forum/showthread.php?t=73349]GUIDE TO SEARCHING. [i] (Some of the forum software is different but, it has helped me a lot.)[/i][/url][/b]
[b]"Those who don't know history are destined to repeat it." Edmund Burke[/b][/size]
When I replaced mine, I didn't release the pressure on the torsion bar first. I did just like you did except I had the vehicle a little higher. I folded the lower control arm down until all the pressure was gone, marked the position of the torsion bar in the control arm, removed the bolts thru the bushing and removed the control arm from the vehicle, then slid the control arm off the torsion bar.
I put it back on the same way, used a floor jack to swing the control arm back into place therefore putting tension back on the control arm.
I just looked and your post was 4 days ago. If it's not to late, you are 90% there.
James
I put it back on the same way, used a floor jack to swing the control arm back into place therefore putting tension back on the control arm.
I just looked and your post was 4 days ago. If it's not to late, you are 90% there.
James
I haven't touched the car in a few days.JaVeRo wrote:When I replaced mine, I didn't release the pressure on the torsion bar first. I did just like you did except I had the vehicle a little higher. I folded the lower control arm down until all the pressure was gone, marked the position of the torsion bar in the control arm, removed the bolts thru the bushing and removed the control arm from the vehicle, then slid the control arm off the torsion bar.
I put it back on the same way, used a floor jack to swing the control arm back into place therefore putting tension back on the control arm.
I just looked and your post was 4 days ago. If it's not to late, you are 90% there.
James
I decided to wait. I'm going to replace the stock upper bushings. But the lowers I'll wait to get another set of control arms. I'll powdercoat them and then I'll install the poly with them.
[size=75]-Tony
[b]2001 GMC Sonoma Crew Cab SLS[/b] | 4.3L 262ci 90º V6; Hydra Matic 4L60E |
0 mods getting it back to factory shape then modding.[/size]
[b]2001 GMC Sonoma Crew Cab SLS[/b] | 4.3L 262ci 90º V6; Hydra Matic 4L60E |
0 mods getting it back to factory shape then modding.[/size]
-
Horsehammerr
- Crew Elite
- Posts: 779
- Joined: Sun Apr 15, 2007 2:03 pm
- Location: Kimberling City, MO.
Just went through trying to lube my "02 SR5. PITA with zerks pointing in all but the right direction. I started looking at changing these problems and saw that my driverside balljoints had been replaced, but not the other side. How dumb can that be. Kind of like changing brakes on one wheel. Anyway, I wonder if anyone could walk me through changing balljoints and bushings at home under my best shade tree. I will also level the front end UP with a TBC and get alignment. Thanks in advance to all who will help.
[size=75]'02ZR5 YellowCruzCab-Airbox chopped,Quadlights,Intake defuser chopped,Precat chopped,HD Bilsteins, 9x16 '84 Corvette wheels, NEXEN 245/50 tires, front & rear Sway bars, All Poly bushings in full suspension, front lowered 3 1/2", ZR2 rearend with 5" suspension lowering , FUN FUN FUN
-
Horsehammerr
- Crew Elite
- Posts: 779
- Joined: Sun Apr 15, 2007 2:03 pm
- Location: Kimberling City, MO.
Forgot to say this is the first faze in my complete Marvelous Mystery Lift,next faze Bilsteins all the way! What are the part #s for the right ones and is there a different set after 2inch body lift? How about after 33x9.5s ?
[size=75]'02ZR5 YellowCruzCab-Airbox chopped,Quadlights,Intake defuser chopped,Precat chopped,HD Bilsteins, 9x16 '84 Corvette wheels, NEXEN 245/50 tires, front & rear Sway bars, All Poly bushings in full suspension, front lowered 3 1/2", ZR2 rearend with 5" suspension lowering , FUN FUN FUN
-
HenryJ
- Admin K Elite
- Posts: 12705
- Joined: Tue Oct 01, 2002 9:14 pm
- Location: Ontario, Oregon
- Contact:
Bilstein part numbers
A body lift does not affect the shock length.
BFGoodrich AT KO
The Marvelous Mystery Lift
A body lift does not affect the shock length.
BFGoodrich AT KO
The Marvelous Mystery Lift
"Speed doesn't kill, suddenly becoming stationary does." - Richard Hammond
"Speed is just a matter of Money - How fast do YOU want to go?"-Mechanic from Mad Max-
If at first you don't succeed - Don't take up Skydiving! - ThunderII KE7CSK
-
Horsehammerr
- Crew Elite
- Posts: 779
- Joined: Sun Apr 15, 2007 2:03 pm
- Location: Kimberling City, MO.
Thanks for the #s HJ. I may go 10.5 on the BFGs,just a thing about tread width I lean on. Still no help on balljoint replacement, Help Please.
[size=75]'02ZR5 YellowCruzCab-Airbox chopped,Quadlights,Intake defuser chopped,Precat chopped,HD Bilsteins, 9x16 '84 Corvette wheels, NEXEN 245/50 tires, front & rear Sway bars, All Poly bushings in full suspension, front lowered 3 1/2", ZR2 rearend with 5" suspension lowering , FUN FUN FUN
-
killian96ss
- Crew K Elite
- Posts: 2669
- Joined: Tue Sep 09, 2003 11:53 am
- Location: Sacramento, California
-
killian96ss
- Crew K Elite
- Posts: 2669
- Joined: Tue Sep 09, 2003 11:53 am
- Location: Sacramento, California
Here is a little bit of info.
My front end project
Ball joint replacement
Replacing Ball Joints what do I need to know, any tricks?
Getting lower ball joints, idler arm, & pitman arm
If you need more info do a search for "ball joint replacement", that's what I used to get this info.
Steve
My front end project
Ball joint replacement
Replacing Ball Joints what do I need to know, any tricks?
Getting lower ball joints, idler arm, & pitman arm
If you need more info do a search for "ball joint replacement", that's what I used to get this info.
Steve
-
border man

- Crew Elite
- Posts: 475
- Joined: Sat Nov 15, 2003 12:06 pm
- Location: AZ
- Contact:
Courtesy of http://www.Autozone.com Additional info with pics can be seen there in the repair guides. Choose 1999 chevy s-10, as that is as high as they go, although the suspension is almost identical.
4WD Vehicles
On 4WD vehicles both the upper and lower ball joints are removed in the same manner. Once the joint is separated from the steering knuckle the rivets are drilled and punched to free the joint from the control arm. Service joints are bolted into position with the retaining bolts threaded upward from beneath the control arm. In this manner, the joint is replaced in an almost identical fashion to the upper joints on 2WD vehicles.
Raise and support the front of the vehicle safely using jackstands.
Remove the tire and wheel assembly.
When removing the upper ball joint, unplug the wheel speed sensor wiring connector from the upper control arm.
Remove the cotter pin from the ball joint, then loosen the retaining nut.
Position a suitable ball joint separator tool such as J-36607, or equivalent, then carefully loosen the joint in the steering knuckle. Remove the tool and the retaining nut, then separate the joint from the knuckle.
After separating the steering knuckle from the upper ball joint, be sure to support the steering knuckle/hub assembly to prevent damaging the brake hose.
Remove the riveted ball joint from the control arm:
Drill a 1/8 in. (3mm) hole, about 1/4 in. (6mm) deep into each rivet.
Then use a 1/2 in. (13mm) drill bit, to drill off the rivet heads.
Using a pin punch and the hammer, drive out the rivets in order to free the ball joint from the control arm assembly, then remove the ball joint.
[size=75]I didn't do it, it was already like that when I got it.[/size]